Christmas Lights
Ok one of my other side projects, hobbies, obsessions is Christmas Lights. Always was fascinated by them as a little kid and always loved decorating the house with lights for Christmas. In Georgia they used to refer to our house as candy cane lane. Anyway’s 2 years ago I came across some lights from GE called Color Effects lights. The are basically tri-color LED lights with covers on them that make them look like the original large C9 type Christmas lights. The lights come 50 on a string and a little controller that allows them to cycle through 12 different settings. That’s ok, but I also came across a hack that removes the original controller and connects them to an Arduino microcontroller and gives you total control over them. The geek in me just...
Hand me the shoehorn please…
Well the weekend finally arrived and as planned we got the engine installed. Destinée was off today so she was around to help me. Add in the great weather today and it was a perfect day to take this next major step. Our first step was to prep the engine bay by masking off all the areas where we might ding the powder coat. Destinée got to work on that part while I prepped the hoist for the engine. Here is the result. We are using a combination of regular blue painters tape and then we put another layer of exterior blue tape on it. The exterior tape is a plastic and it’s really tough. I found out when I installed the differential how tough it was. I banged the frame pretty good getting the diff in and expected to have some chips in the powder coat but the...
A Marriage
As promised and I’m sure as anticipated, at least by me, we started working on the engine this weekend in preparation to install it next week. Here are some pics of the engine with the plastic pulled off and it still sitting on it’s shipping pallet. In case you’re wondering, all the blue tape is sealing off all the openings to keep whatever miscellaneous junk might be floating around out of the engine. It’s a Ford Coyote 5.0 Liter all Aluminum Twin Overhead Cam V8. It produces 412 horsepower and 390 foot pounds of torque. This is the same engine that’s in the current 5.0 liter Mustang. The nice thing is that there are plenty of aftermarket upgrades that can get even more horsepower out of this engine without opening it up. For now...
Getting Hosed.
No not in the bad way. Last weekend before taking off to Atlanta for SCTE EXPO I got a chance to run the fuel lines and some of the fuel hoses. As for the hoses I’m running Braided Stainless Steel hoses to go with the Stainless Steel hard lines. If you have been following the build you’ve heard me talk about them before. All of the fuel line fittings will be the 37º AN-6 fittings. So to start I ran the hard lines first. The pic below shows the 2 lines running along the rear down tube on the passenger side. This is right behind the passenger seat but on the outside of the car in the wheel well. You can see one of the cockpit panels on the right. On the left side you can see the differential. The lines run underneath the car along one of the main...
The Great Pumpkin
With Halloween right around the corner I couldn’t resist. The differential is also referred to as the pumpkin so now you know. So the diff went in this weekend. I got it back from Lou’s on Friday, Lou took care of rebuilding it for me. I decided that I would be better off letting Lou take care of it since he has all the right tools and experience. Now getting it installed was a whole other thing. For the first couple of hours it seemed like a classic case of square peg-round hole. The install manual says it comes up from the bottom, pinion first with axle holes aligned front to back. As you can see in this first pic, given the weight of the unit about 45 pounds I used my engine hoist so I didn’t have to worry about it falling on my head and...
Flare Time – Part Deux
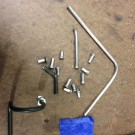
So I got my new flaring tool and boy is it nice, makes a perfect 45º inverted flare every time. It’s a really nice pro tool and lives up to what everyone online said about it. It makes a perfect flare every time. Only problem is, turns out stainless is really hard to flare and every flare I tried on the stainless tubing resulted in a crack in the flare. To make sure I wasn’t doing something wrong I used the same procedure on the regular steel lines and had a perfect result. So after much trial and error as you can see in the pic below and that’s only half of the bad ones. So perfect flares, no broken tool but still a cracked line. Hmmmmm what to do. Off to Google I go and after some digging I found a tip that suggests slightly heat the...
Flare time or maybe not
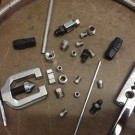
Well this weekend I was looking forward to finally getting to start to run the fuel and brake lines. Most of the stuff I need has arrived, fittings, tubing, adapters and the flaring tool. I already have a flaring tool but since I’m running Stainless Steel lines I needed a tool that was able to handle the harder stainless lines. To make things more complicated there are really 2 main options when it comes to flares. There is the double inverted 45° flares which you will find on just about every production vehicle. And then there is the 37º AN type flare, you will find these on aircraft and in the car world they are the red and blue fittings used with stainless steel braided hoses that you see on many hotrods. The pic below is an example. For the trivia buffs...



Recent Comments