
More Miscellaneous and DOH!
The last couple of weekends have been about wrapping up a lot of little items with the goal being to get the engine bay panels out to the powder coater. Well I think I’ve got everything done that I need to. First on the list was to finish off the access panel on top of the driver side footbox. This panel is removable from the engine bay and provides access to the brake master cylinders. The normal way or the way the kit provides to attach it is self tapping sheet metal screws. Problem is I just don’t like the look of them. I’ve sorta had this theme going with everything that I’ve been mounting using Stainless Steel cap head screws. I like the look of them and it’s bringing a bit of consistency to the look of everything that’s mounted. So I continued the theme with this cover. In the pic below I’ve finished installing the rivnuts in the main panel.
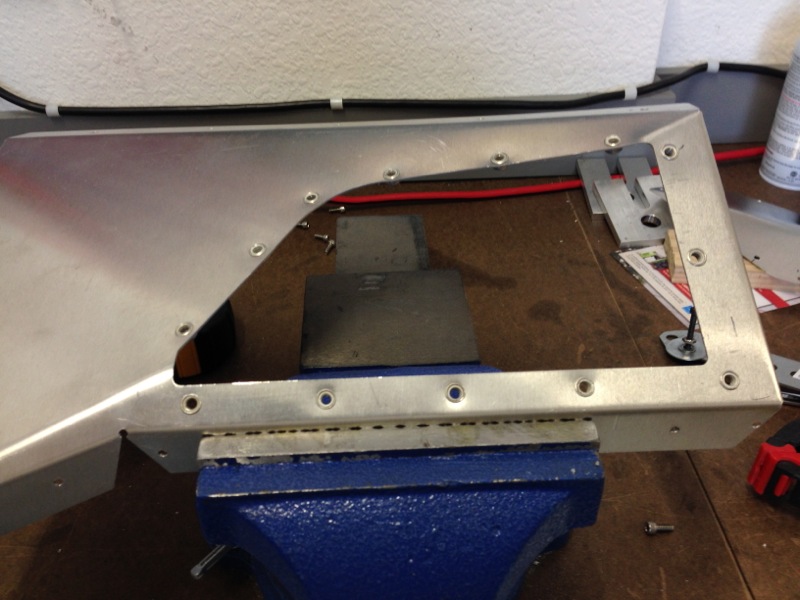
Below the cover panel is in place and secured with the cap head screws. I think this is a much cleaner look.
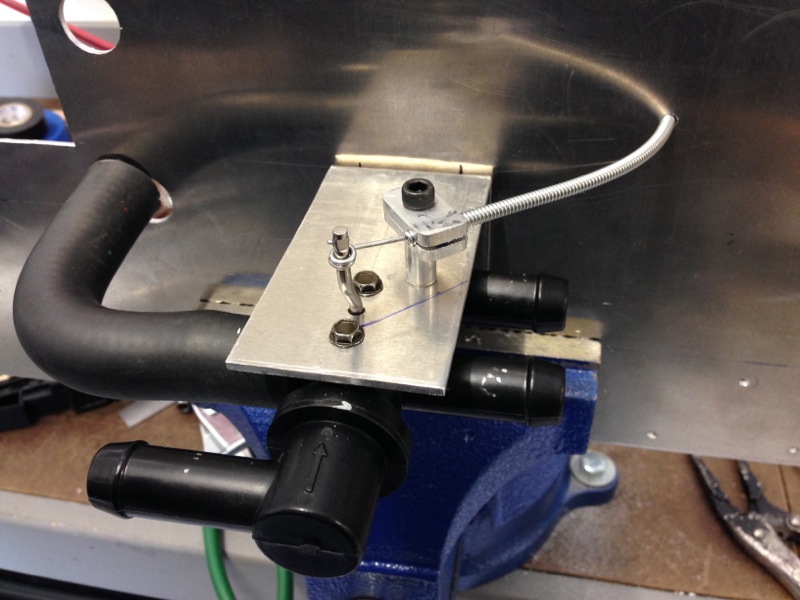
Next on the list was to finish the control for the heater valve. Nothing fancy here just a cable pull that will either open or close the valve when we want heat. On the other end will be a small handle on the dash that you pull out to open the valve. I fabricated the standoff and the 2 pieces of aluminum to clamp down and hold the cable guide. Works great.
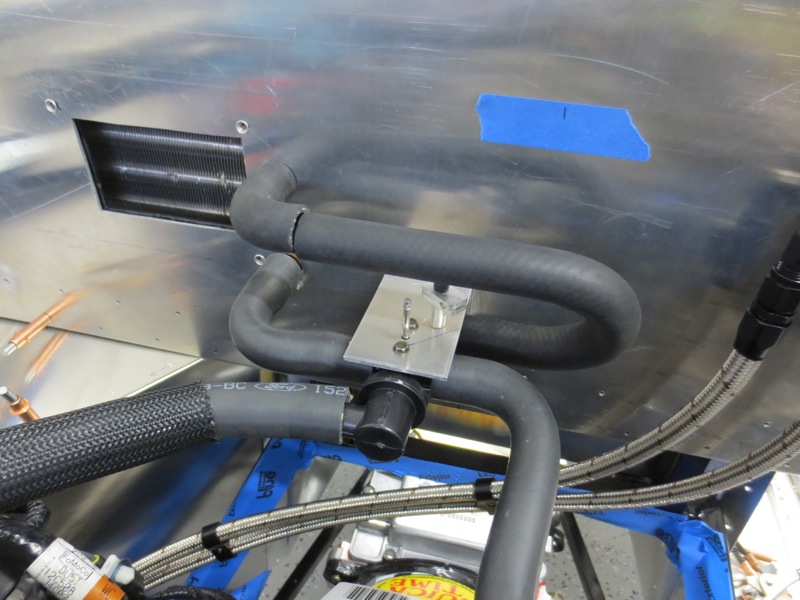
After that I finished up the heater hoses. I ended up ordering the stock hoses for this engine that fit on a Mustang. That took care of the front end where they connect to the engine but back at the heater valve I had to do some hose work. The hose on the bottom left of the pic is the stock hose, after I cut off the factory end it fit right onto the valve so I lucked out there. I wasn’t so lucky on the return hose. So I spent some time at the local auto parts store and they were nice enough to let me in the back where they keep all their pre-formed heater hoses. I was able to pick a few that I thought I could cut and make fit. The hose on the lower right is the return to the engine. It’s an S shape and I’ll just have to have one joint on it. It will eventually end up under the engine cover so you won’t even see it. You can see where it connects to the engine hose in the second pic below. The hose on the upper left is the feed to the heater core (you can see the core in the rectangular hole on the left side of the pic) and it was just a 90º that I was able to cut to length. The hose on the upper right side I had to make from 2 hoses as you can see. It’s another 90º with a U shaped hose. I’ll add a union there and unfortunately you will see the extra hose clamps. I don’t like the look but for now and until I can find a hose that matches this shape it will have to do.
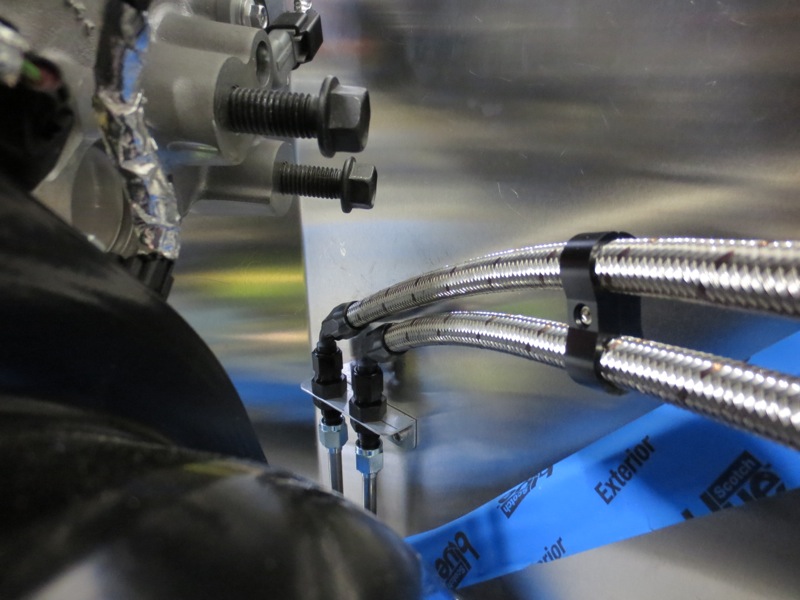
After finishing up the heater hoses I made up some more braided hoses and connected the fuel pressure regulator. The line on the left side of the regulator is the feed and the line on the bottom is the return to the fuel tank. The hose on the right side is the feed to the engine and fuel rail for the injectors.
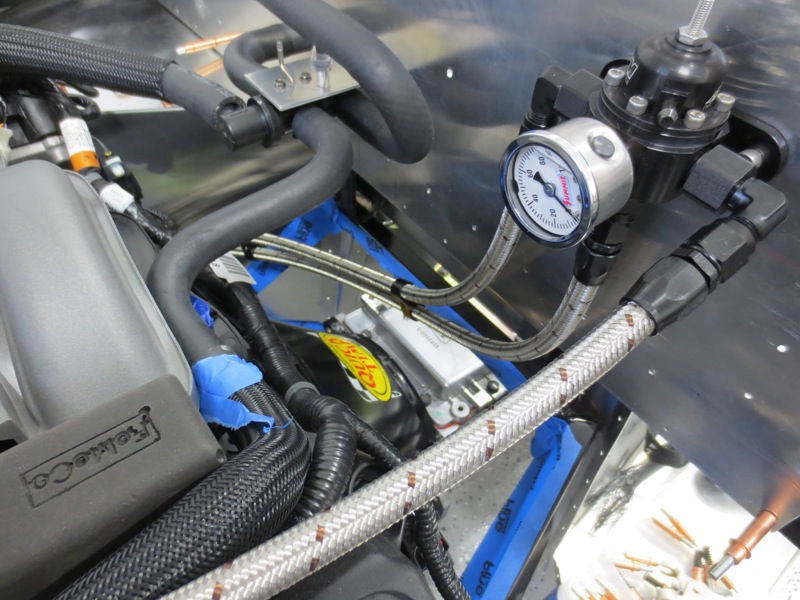
Here you can see the feed line and the return and where they connect to the hard lines that come up on the passenger side.
With those major items out of the way the only thing I had to do was finish mounting 2 more panels. One is a 3″ round cover that supports part of the wiring harness and the second is just a rectangular panel that closes off a side on the driver foot box. The second panel was easily handled like the top cover, I put in some rivnuts and used some more Stainless cap screws. The round cover turned out to be a bit more difficult. As you can see in the pic below where it mounts there is a steel plate that makes up the top part of the foot box and supports the master cylinders. I decided instead of using rivnuts here, and because I didn’t have any on hand that were big enough for this thickness of steel, that I would just tap the holes for the cap screws. And so that’s what I did but first I had to run to Home Depot to get the right size tap.
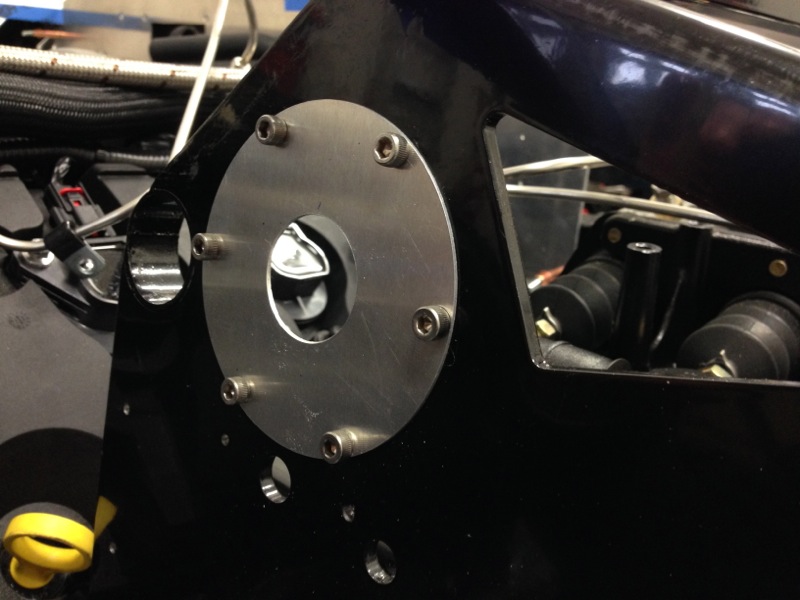
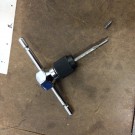
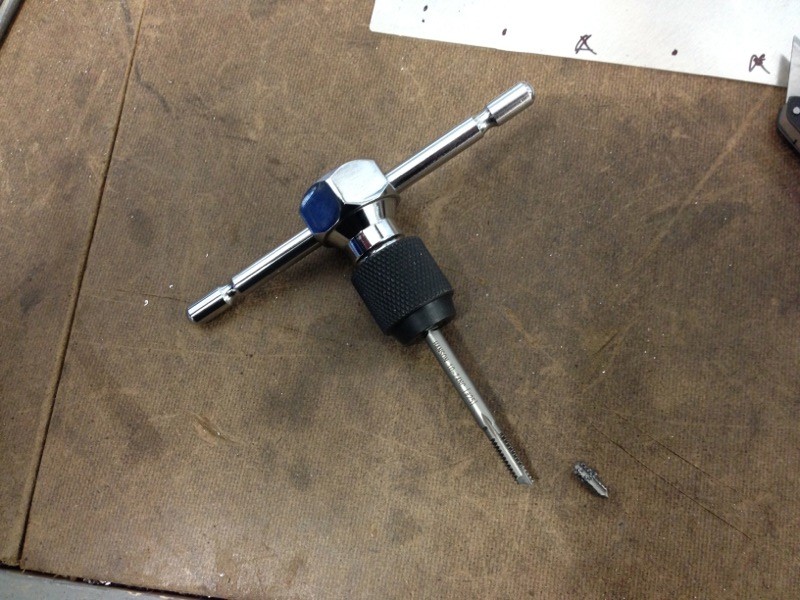
And everything was going great until I broke the tap on the fifth hole. DOH! In case you’ve never used a tap and/or broken one, well they’re made from hardened steel which makes them brittle and if you break one good luck getting it out. And for the record it was my fault, I should have backed it out sooner to clear the flutes of the tap and it wouldn’t have broken. The small metal flakes that it creates by cutting the threads build up in the flutes and can jam up the tap. You’re supposed to back it out regularly as you’re cutting the tap and I pushed it to far. I should have known better. Fortunately, after I expressed myself with some very colorful language to no one but myself, I managed to get it out. There was enough of the tap poking through the back side of the hole that I got some ViceGrips on it and was able to start it backing out and that pretty much loosened it up. Funny thing was, it took a few times and being a hardened steel tap it tore up the vice grips a bit before I finally broke it loose. After that it was another trip back to Home Depot for another tap to finish up the remaining 2 holes. I should probably add a tap and die set to my tool collection. Below is the broken tap.
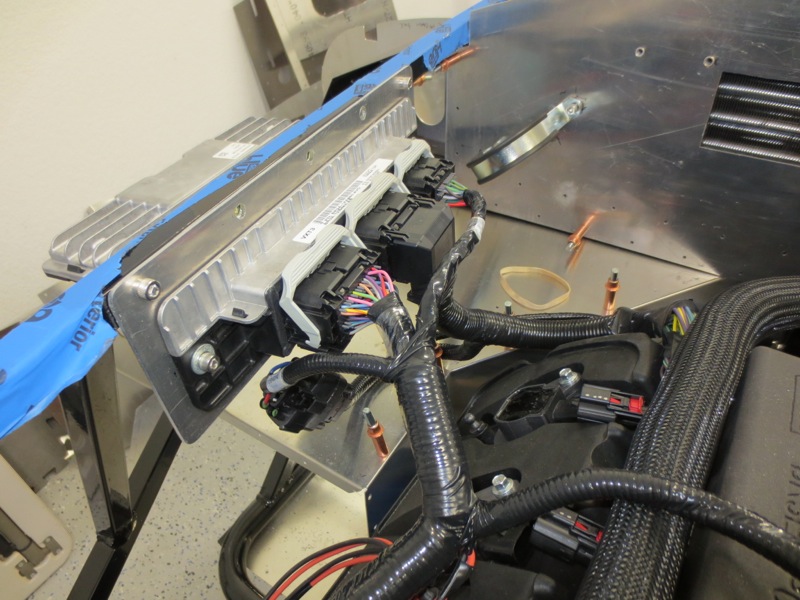
And finally in between a few things I also continued working a bit on the wiring harness, it’s the next major step and I will work on it while the panels are out getting powder coated. Here is a shot of the ECU mounted with all 3 connectors attached. I need to pull apart the outer 2 harness and re-run some of the wires inside the bundles so that they lay in the engine bay better than they currently do. Stay tuned for the pics on all of that. And have a Happy Thanksgiving.
You’re making a lot of progress! Have a great Thanksgiving! Can’t wait to see/ride in the AC! BTW, check out Wayne Carini, Chasing Classic Cars? He found a AC 427 in a barn…it sold for a lot of doe!