
Lots of Fabrication and Miscellaneous
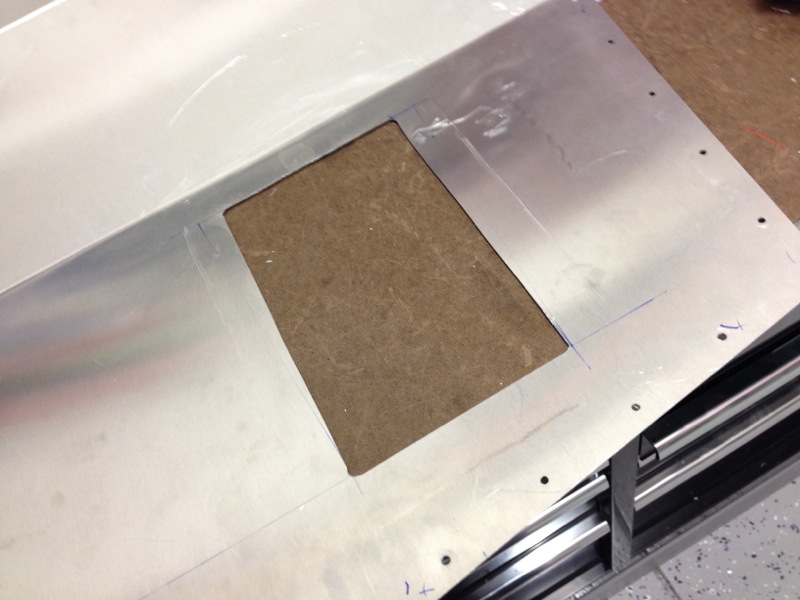
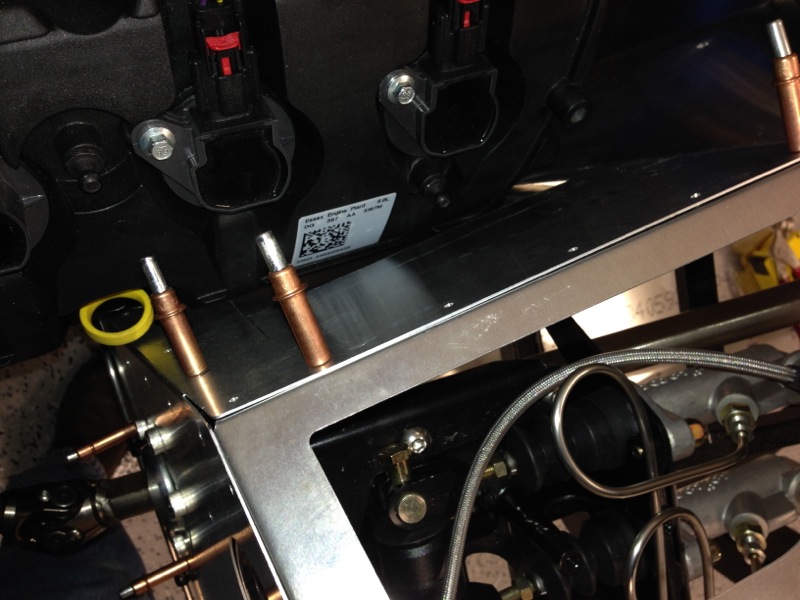
I was out on vacation this week so I got a lot of time to spend on the car, not as much as I would have liked but still good progress. In addition to working on the car I also took care of some of our Christmas decorations. I’ll get to that a little bit later. After getting the engine set in place the first thing I took care of was creating some extra room on the drivers footbox where the head of the engine was hitting it. I cut a hole in the panel and the created a little pocket that I will rivet back in place creating the extra 1/2 inch I need to clear the head.
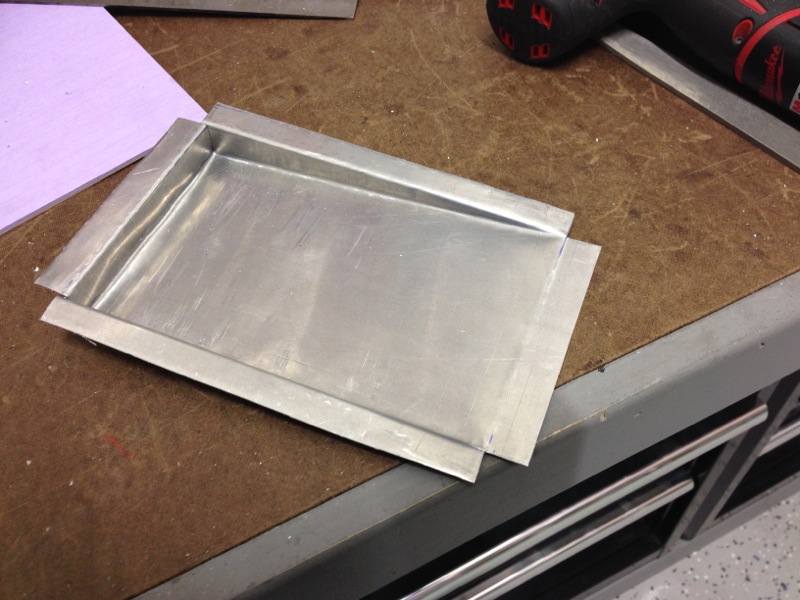
Here’s the pocket I created to fill the hole.
Here’s how it will mount in the hole.
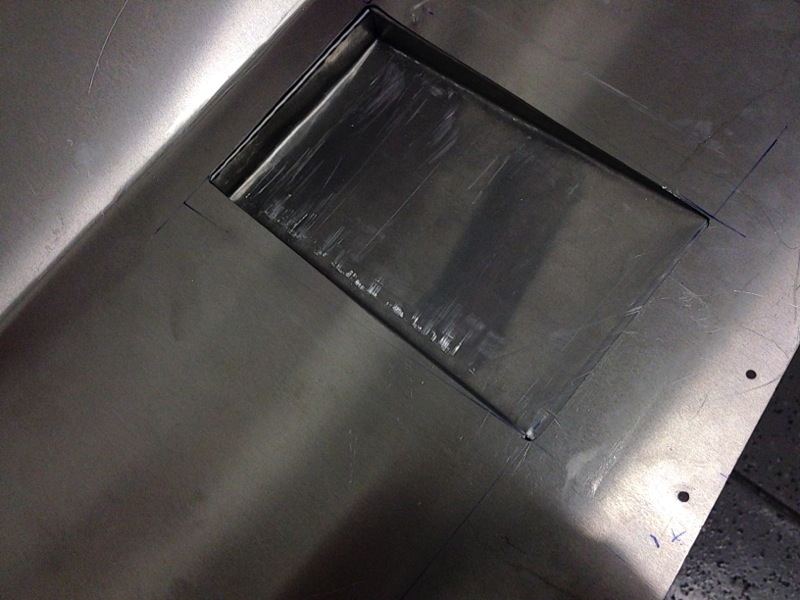
And here is the space it makes for the head clearance. It’s still tight but now the engine isn’t touching the footbox.
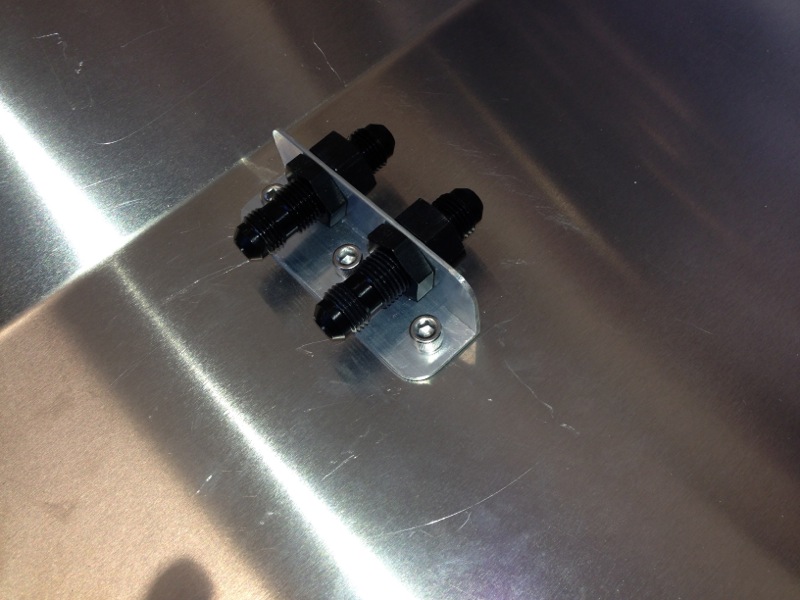
On the passenger side i finished bending and mounting the hard fuel lines. The next step will be finishing the lines from there to the fuel pressure regulator. I haven’t decided yet if I’m going to continue with more hard lines or switch over to braided hose at this point. That will be determined by other items on the firewall and where I can mount the regulator. Here is the bracket that holds the unions for the fuel lines. It’s mounted on the passenger footbox.
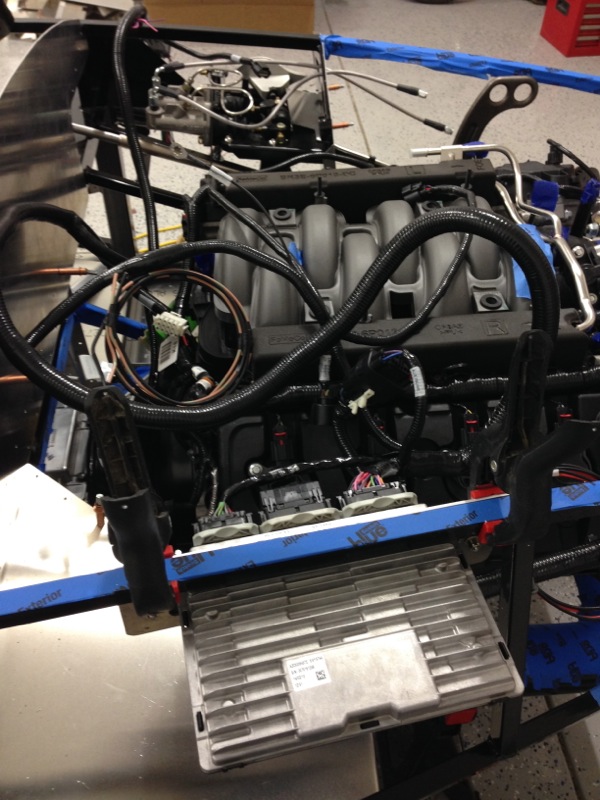
Before I could mount the regulator I needed to mount the heater and the motor for the wipers, before I could mount those I needed to figure out where and how the engine wiring harness fits. Once I laid it in place I realized I needed to decide on the placement of the ECU (Engine Control Unit) and thus I needed to fab a bracket for the ECU.
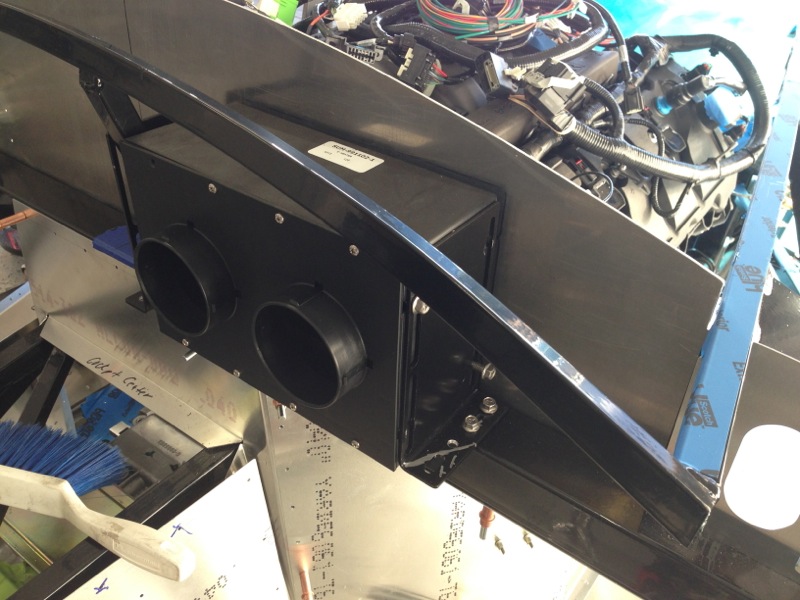
Once that was done I was able to start working on the heater core and blower. This part took a bit of time to figure out the placement of the heater core inside the dash, figuring out how and where to run the duct work and keeping track of everything else that has to be installed behind the dash. After I determined where everything will go, or at least I hope I did, I then started the mounting process and cutting the opening in the firewall to align with the blower on the other side. The pic below shows the heater core on the inside of the firewall. The hoop in front of it is what supports the dashboard.
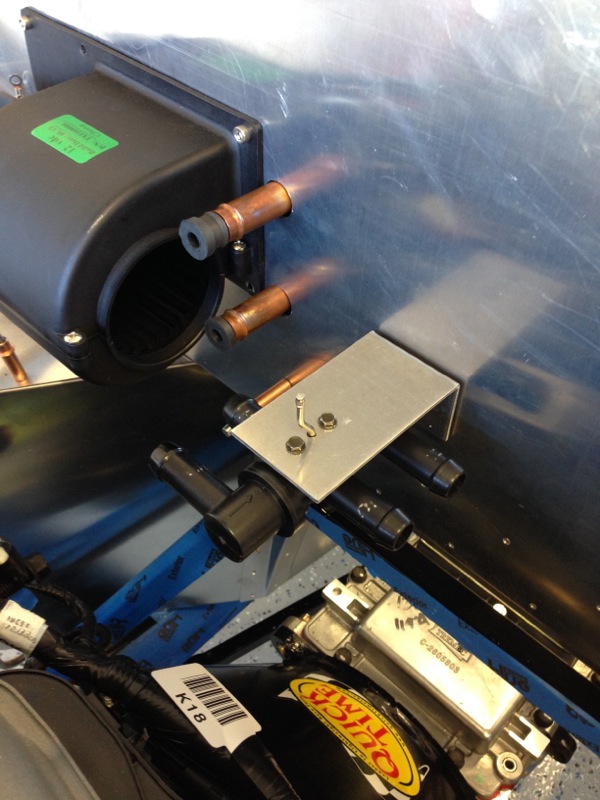
This pic shows the blower on the engine bay side of the firewall and the heater valve. This valve controls the flow of hot coolant into the heater core. I still need to construct a method to open and close it with the small lever on top. I’m currently debating between a simple push pull cable connected to a knob on the dash that you would pull out to turn on the heat versus a solenoid that would open the valve when you turn on the fan.
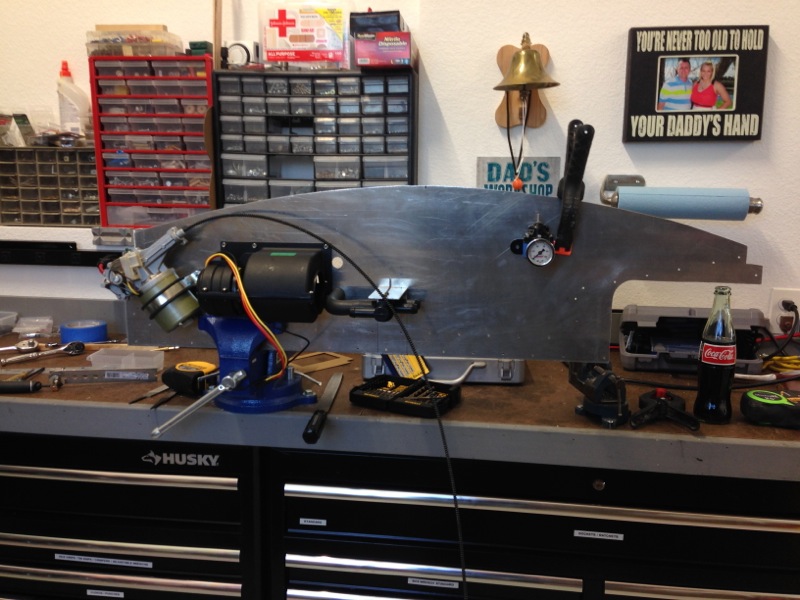
Below is the whole firewall panel. On the left of the pic (passenger side) you can also see the wiper motor. Being temporarily held in place on the right is the fuel pressure regulator. The overall look of the firewall is getting busy and I’m considering building a cover for the wiper motor, blower motor and control valve.
Now about those Christmas lights I mentioned. Check out this other post.
Did you get those parts powder coated as you planned?
Not yet. I’m waiting to get all the fabrication done and then I’ll take them all in for powdercoating.
Well done Randy….
Great way to spend your time off…Home, Car and Xmas lights. ‘
Now back to the working world. 🙁