
Garage – Preparation
WARNING – Long thread about a garage floor – read at your own risk of wasted time.
Now that the car is on order and due to arrive sometime late June early July I had to get busy and get the garage ready, it’s condition just wasn’t going to be suitable to build the car in. So I added some new high output fluorescents lights, 8 in total. I also had the walls painted a nice bright white. This has helped dramatically with the light levels in the garage. Ok so this next part is probably overkill but I couldn’t stand the condition of the garage floor. It had never been cleaned by the previous owner and to make matters worse they had an industrial 2 burner wok that they evidently used quite a bit. This was also why I had to have the walls painted. The soot from cooking in the garage left a good portion of the ceiling almost black. The wok also left quite a bit of grease on the floor. I knew going in this was going to be a challenge but I didn’t expect to spend an entire 4 day weekend taking care of it.
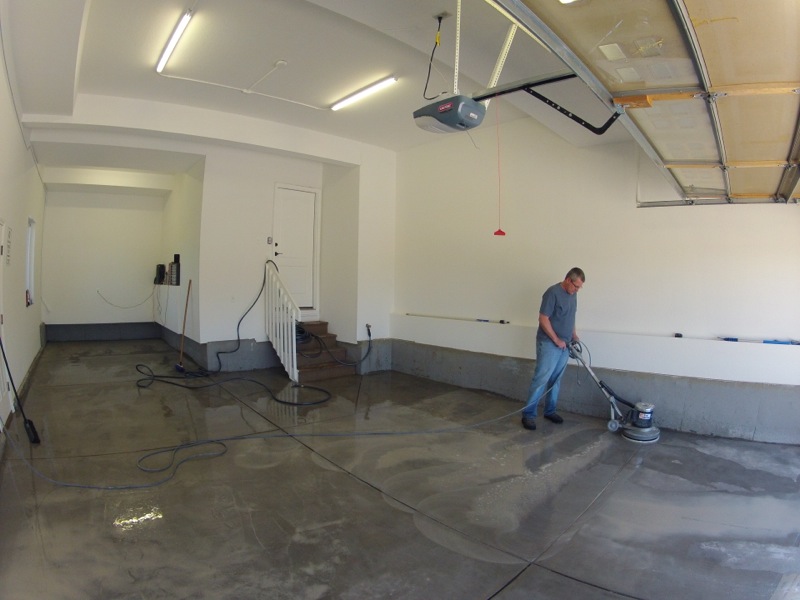
I decided I wanted to put down an epoxy floor covering. My nephew Chris in Florida put down the same thing in his garage and it looked great. Chris got his epoxy from epoxy-coat.com and the price is good and it looks like a high performance product so I went with it as well. While it was a lot of work I am happy with the result and the product, if you’re considering it I would recommend the product. The real work came in preparing the floor. Chris had the benefit of a brand new floor, as mentioned previously, I wasn’t so lucky. At first I thought I might be ok as the floor had been sealed but that didn’t seem to matter. As a matter of fact it made it worse since I had to remove the sealer. I went to Home Depot and rented the buffer and the rental guy recommended the 100grit sanding discs instead of the diamond wheel. Some advice I shouldn’t have listened too. Anyways after sanding the first 2 sections I realized I was going to need the diamond wheel. BTW, it’s been 25 years since I ran a buffer back in my Air Force days, surprisingly the skills came right back. Back to Home Depot to rent the diamond wheel. Once I got that on then I started making progress. I did the grinding with water to keep the dust down and to make the cutting more effective. The one downside, which I discovered later, was that the water created a slurry from the concrete particles being ground up and spread them across the floor. This ended up taking me almost all of the next day getting cleaned up. Be interesting to see what our water bill is this month.
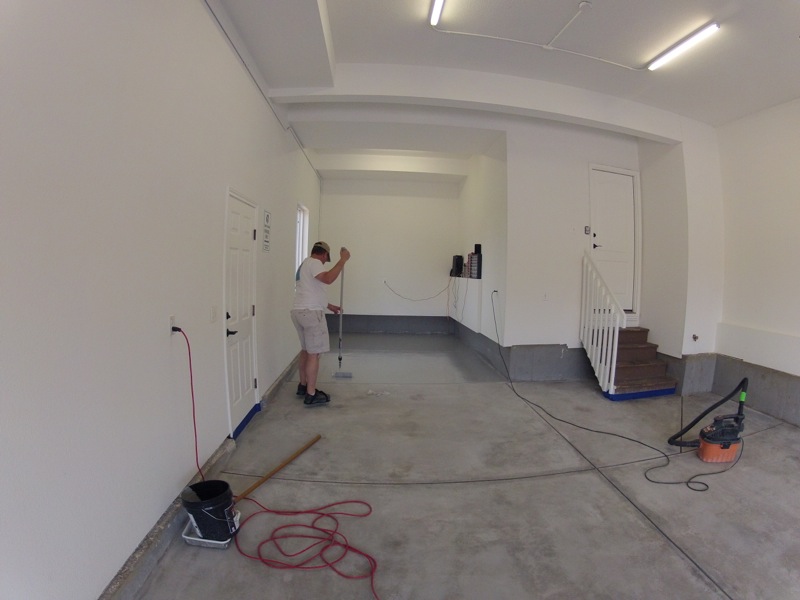
Once the floor was ground and the slurry cleaned up I still had a little bit of water beading where the wok had been sitting. The instructions for the product have you test the preparation of the surface by putting a few drops of water on it and seeing how fast the absorb, this is important to make sure the epoxy will bond. Well even after all the grinding I was still getting some beading, so to the muriatic acid I went to degrease that one area. That finally got it done. Now I just had to wait for the floor to dry.
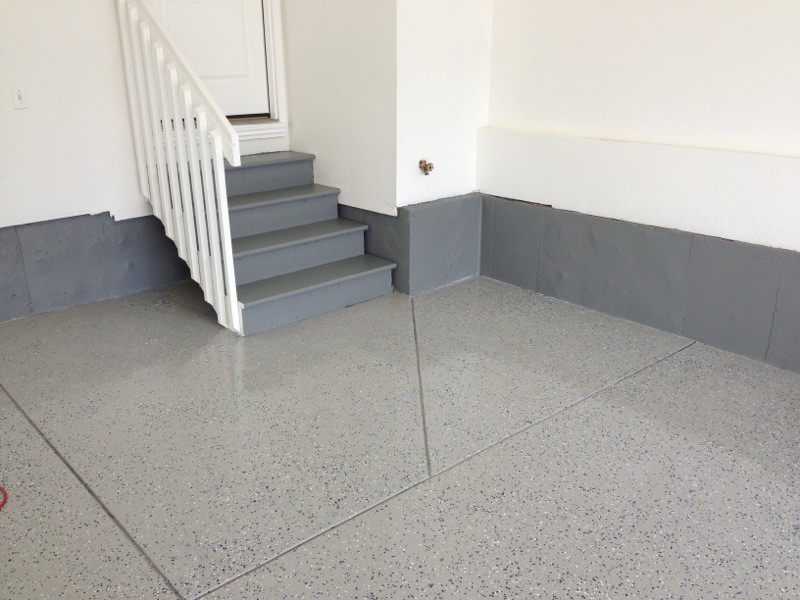
Now that everything was dry and ready I started mixing the epoxy and working the floor in sections. This is something that would benefit from having a helper. Nevertheless I got it all pored down and spread even. I added 3 color chips as you can see in the pics below and I also added the Aluminum Oxide anti slip. I’ve heard that epoxy floors can be pretty slick when wet and I wanted to make sure no one was slipping on this so I added it. I didn’t realize that the color chips add a certain amount of anti-slip as well, if I didn’t again I’m not sure I would add it.
With that done all that was left was to refinish the stairs, as they were bring the whole look of the place down, and the side walls. That I took care of with some concrete paint that’s just a bit darker than the gray on the floor. Overall I think the end result looks pretty good.
Love the floor Randy, I’ve been wanting to do that to mine… looks awesome! Would you use the water if you had to do it again when you did the diamond buffing?
Yes I would but I think it would be easier to have someone else helping. That way they can keep the water running on the floor and rinsing it at the same time.
Awesome, now I have to do this to mine! Can’t wait to see more.
Awesome timing and planning!
(I think I would be as happy as you just to have a garage like this!)
Good Luck and enjoy the build!
mark…..
I can attest to the epoxy floors being very slippery when wet. Living in FL during the rainy season my garage gets to be like a skating rink.
My floor is a glossy beige color and shows dirt easily. I like your color and think that the chips will help keep the floor looking clean.
So It looks great, I’ve been wanting to do this with my floor for some time now. It seems that most of the effort is around Prepping the floor and the coating process is relatively easy/fast.
Looking forward to seeing Car Parts on the new floor.
JD
16 years as a buffer tech, it better look good!
Dude! Love the whole adventure you’re doing. I know you will have a fun time doing it and I can can also see you and Caroline out riding around when it’s done. Have to get my Mopar out. Remember next time in Vegas a trip to the Shelby plant at the speedway is in order.
That’s once nice looking floor! Moved into a house last July that had its garage “professionally” by Rhino Flooring.
I got to admit, it doesn’t look near as good as your finish.
Looks great, Randy. What a cool project. The Type 65 Coupe is at the top of my list of dream cars.
We’re moving to a new house in a few months, so I’ll have a fresh concrete floor. Would you recommend this epoxy solution? You think the paint chips alone provide enough traction?
Looking forward to watching your build progress.
Now that I’ve had some water on the floor I’m not sure the color chips alone would provide all that much more anti-slip. The aluminum oxide definitely does. I didn’t get the anti slip as evenly distributed as I would have liked and the areas that didn’t have much you can tell are much more slippery than others. As far as recommending the product – I would at this point. I’ve only had it down a few weeks and besides everyone whose seen it saying how good it looks it also seems really tough. I’ve been building my work benches and I’ve dropped a few tools on it and dragged a few things across it that I expected to either scratch or ding it but so far nothing. Overall seems to taking a beating really well.
Regarding the Type 65 Coupe, not sure if you noticed in the Build School Complete post in the gallery starting on the 5th page one of the instructors brought by their Type 65 Coupe. The pictures don’t do the car justice. After seeing it in person, I might just add it to my list also.