
Flare Time – Part Deux
So I got my new flaring tool and boy is it nice, makes a perfect 45º inverted flare every time. It’s a really nice pro tool and lives up to what everyone online said about it. It makes a perfect flare every time. Only problem is, turns out stainless is really hard to flare and every flare I tried on the stainless tubing resulted in a crack in the flare. To make sure I wasn’t doing something wrong I used the same procedure on the regular steel lines and had a perfect result.
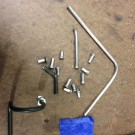
So after much trial and error as you can see in the pic below and that’s only half of the bad ones. So perfect flares, no broken tool but still a cracked line. Hmmmmm what to do. Off to Google I go and after some digging I found a tip that suggests slightly heat the stainless prior to flaring. At this point I know how to make a perfect cracked stainless flare so what have I got to loss. I bust out the propane torch and BAM a good flare. Now I’m excited and try a few more and each one turns out perfect. So it turns out a little heat and all is good. The only thing I have to keep an eye on is that if I heat it too much it causes the stainless to discolor.

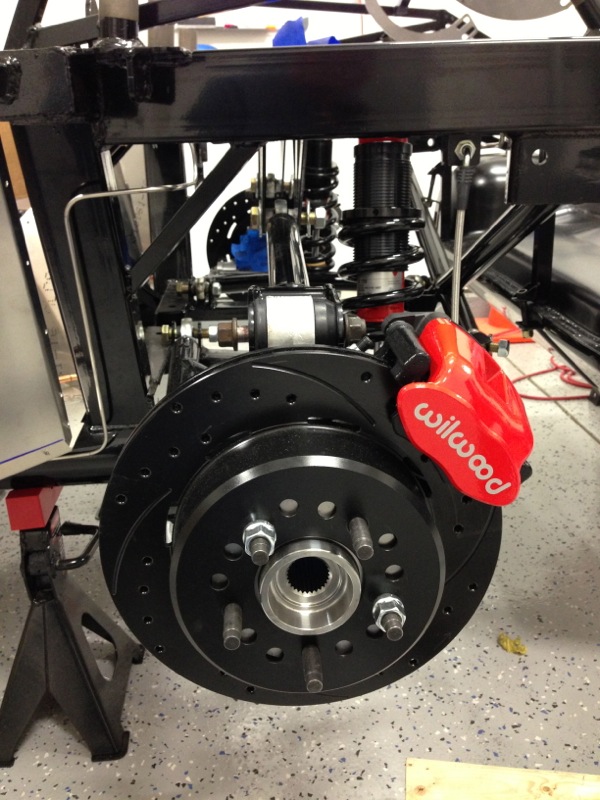
With the flares working I started to run the brake lines starting at the rear. I should probably mention that the rear brakes came in and I got them mounted last weekend. In the pic below you can see the rear brakes as well as the flex line on the right side, it’s coming up from the red caliper and mounts to the fitting just under the frame rail. The stainless brake line is on the left side of the pic running down the center of the frame.
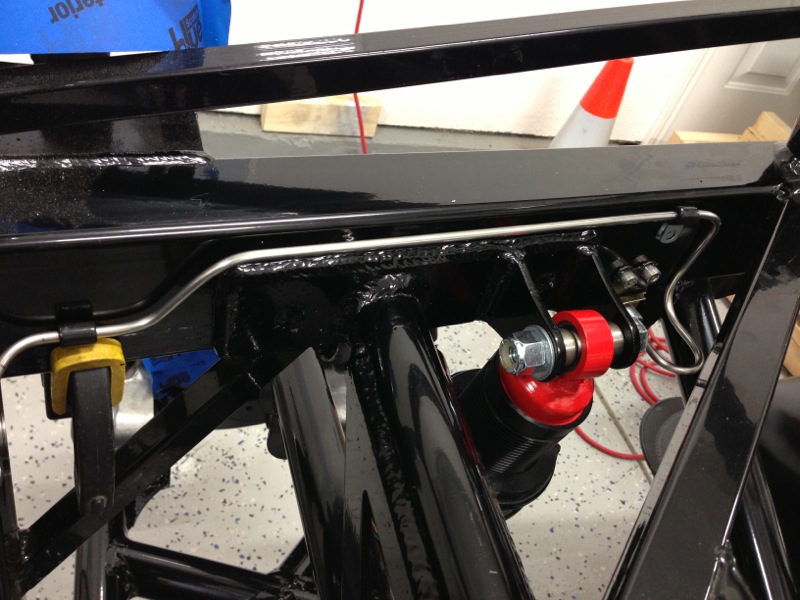
So the rear lines are pretty much run, the line that runs down the left side of the pic above goes underneath the driver side floorboard and along the driver side main frame tube. It runs toward the front stopping about a foot short of the front of the driver side foot box. I’ll add an extension and then run it up to the master cylinder. Here are a few more detail pics of the lines. In the pic below you can see the passenger side rear brake line, it starts just to the right of the shock and the goes up and around towards the left side. Right at the left side of the image is where the line turns and crosses over to the drivers side. Where the line starts on the right side it connects to a fitting that allows for the transition to the flexline in the pic above. The fitting is held in place by a bracket I had to fabricate and mount to the frame. In the pic you can see 2 hex head bolts holding it in place. Those are attached to the frame via 2 Rivnuts. I’ll explain those later.
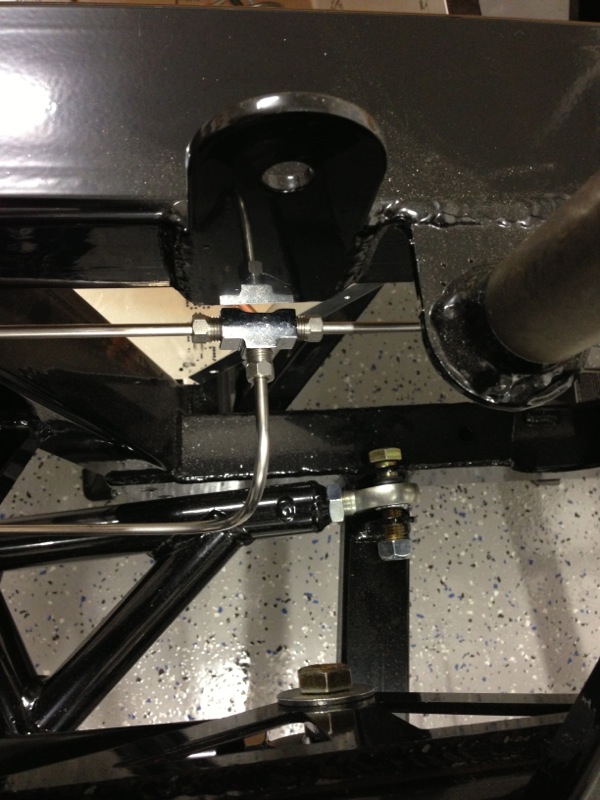
Below you can see where the passenger rear line enters the tee from the right. The line on the left is from the driver side rear and the line in the center of the tee is the line that runs forward to the master cylinder.
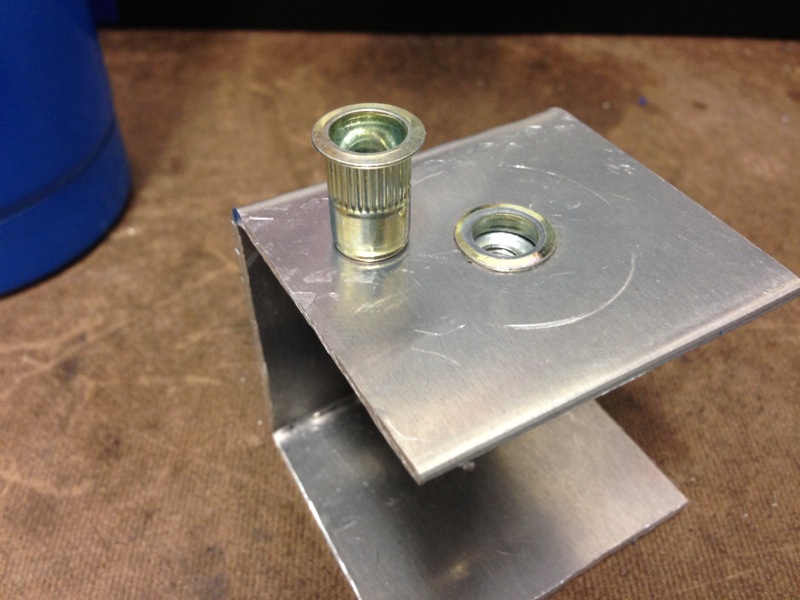
Ok so what what’s a Rivnut? It’s a clever little device, like a rivet it goes into a hole and compresses to hold itself in place. Unlike a rivet which holds to pieces together, a rivnut has a threaded center and once inserted provides a threaded hole to hold something in place, like the brackets for the fittings in the pics above. In the pic below you can see an unused Rivnut on the the left and one that’s been inserted into a scrape piece of metal on the right.
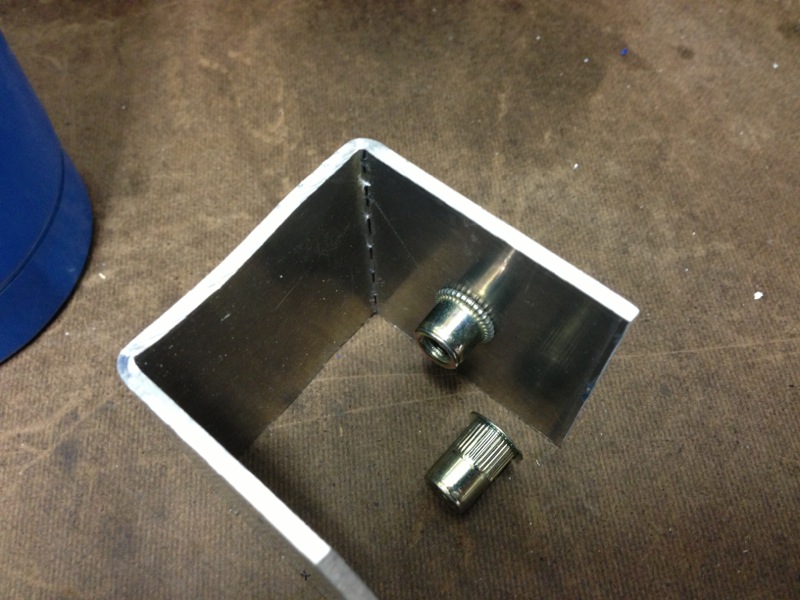
In the pic below you can see the backside and the Rivnut has been compressed thus holding itself into place. The other Rivnut is there so you can see how it’s been compressed. Pretty neat and a nice way to put a tapped hold into an area that’s not thick enough to tap and you can’t get to the backside to put a nut on.
Ok that’s it for this weekend. I hope to be able to finish up the rest of the brake lines during the evenings this week and if all goes well I think I might be setting the engine in the car next weekend if not then the next weekend. So stay tuned it’s getting real exciting.
Randy, I think you’re just doing the bare minimum when it comes to your flare… See Clint over there… Look at his flare… Now he is showing how to flare 🙂
Looking good!
-Richard
Richard,
I was wondering how long it was going to take for someone to refer to one of my favorite movies. I almost included that clip on the page. So you win the price, your red stapler is in the mail.