
Finally an Update!

First off I hope everyone had a great 4th of July.
So regular readers might recall a post from last year entitled “Something a Little Different” well it was sorta that time of year again and hence I haven’t been in the garage for a couple of weeks. Fear not though, with this 3 day holiday weekend I got to spend quite a bit of time with the car and she’s getting really close to being ready for registration. I was hoping to knock it all out this weekend but didn’t quite make it.
But first what was I doing if I wasn’t out wrenching on the car. Well you might recall we also like to take our Land Rover out and do some off roading. So a couple of weekends back we headed out to Moab for 3 days of trail leader training with the Solihull Society in preparation for the upcoming annual Land Rover Rally in September out in Moab. Our guide and instructor was Bill Burke. An all around off roading expert with the experience to back it up and an all around great guy. You can check out his site at www.bb4wa.com
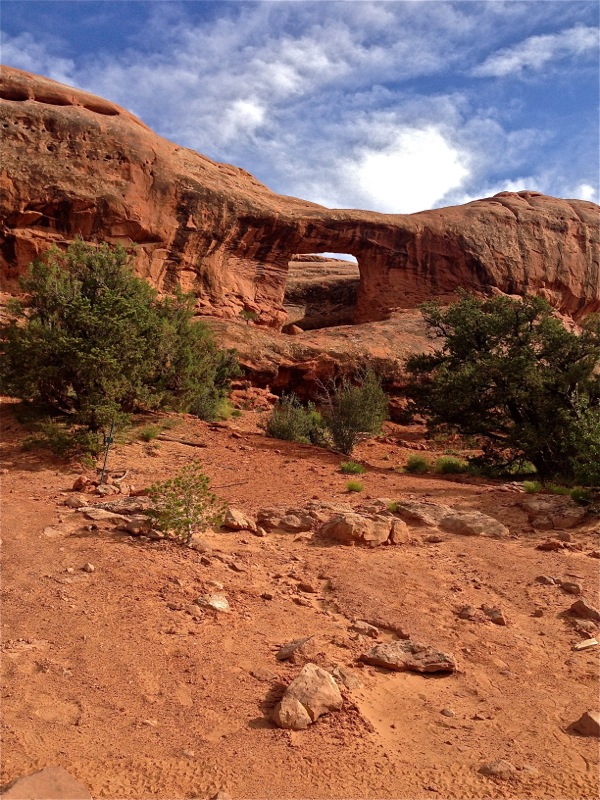
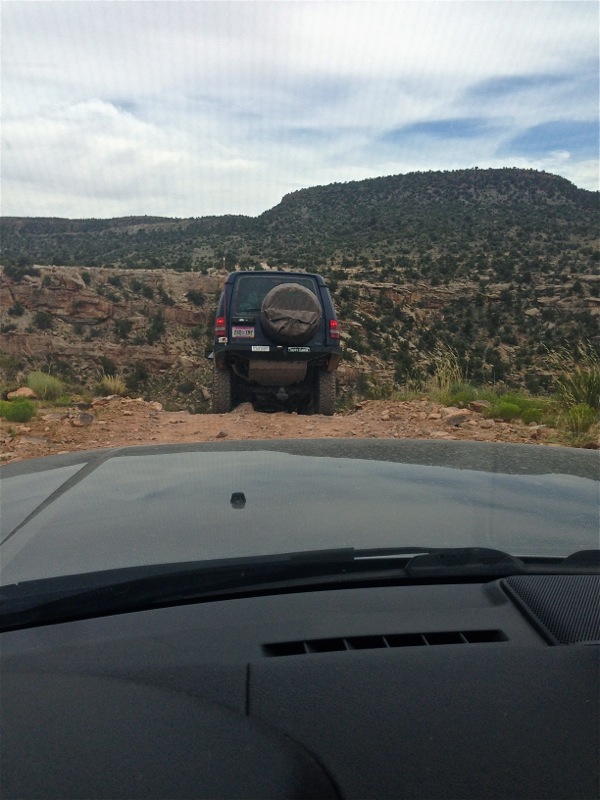
Here are a couple of my favorite scenery shots. If you’ve never been to Moab it’s really worth the trip, it’s only about a 6 hour drive from Denver.
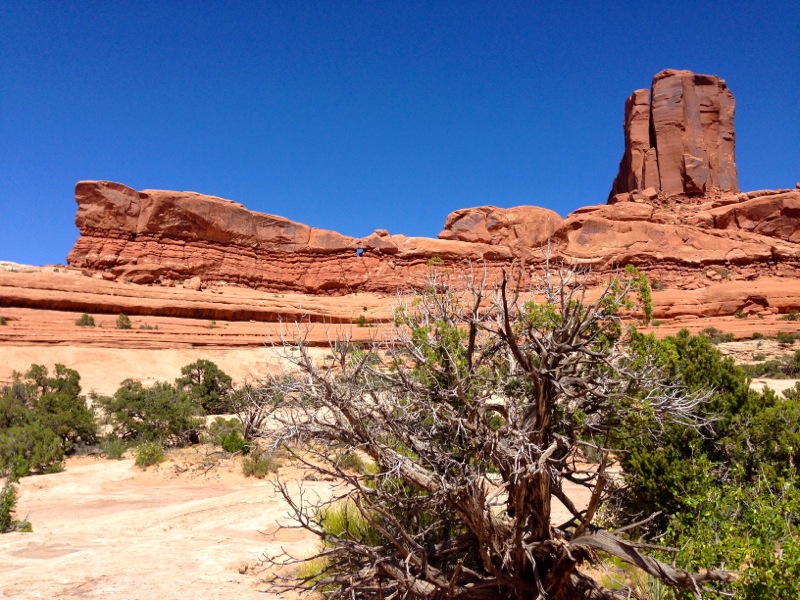
So here’s one of the rocks we were crawling over, you can get a sense of the terrain. This is a solid rock we are on and the truck in front of me is crossing over a crack in the rock.

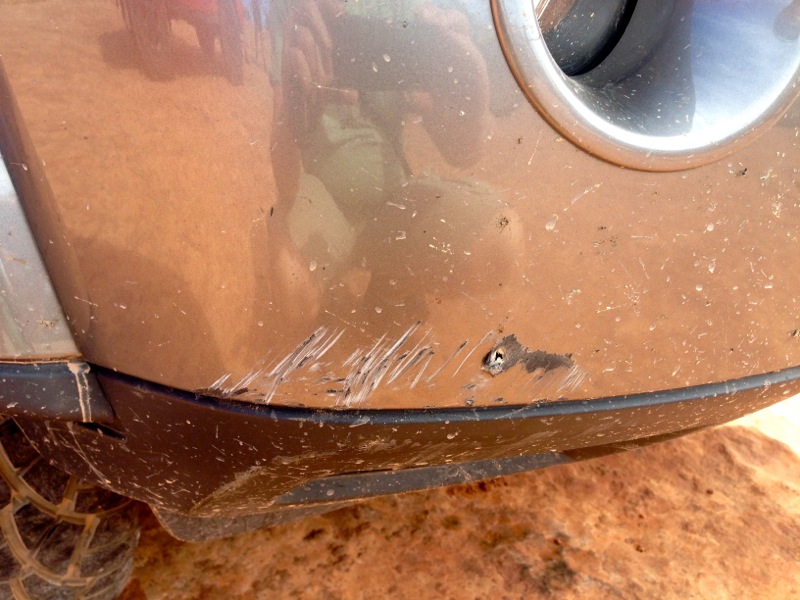
You’re supposed to cross over at an angle so each wheel crosses one at a time, I did that but I took a bit too steep of an approach and dragged the front bumper as you can see below.
Here’s another rock we were climbing up and over. Lots of fun.
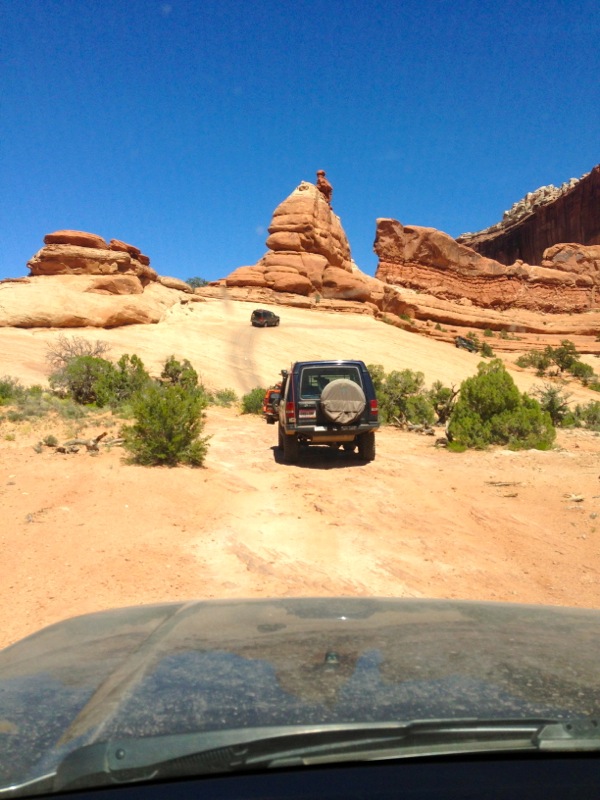
And here’s a trail that appeared to just drop off the edge, you get a sense of the steepness from the truck in front of us.
This was the trail on the other side that we had to then crawl up. At first I thought there was no way. You can get a sense of the scale of the rocks by the people standing on it but that was the point of the training to learn what our trucks were capable of and how to navigate the obstacles. The last vehicle up this hill sliced his right front tire open and we got to practice changing a tire on an incline.
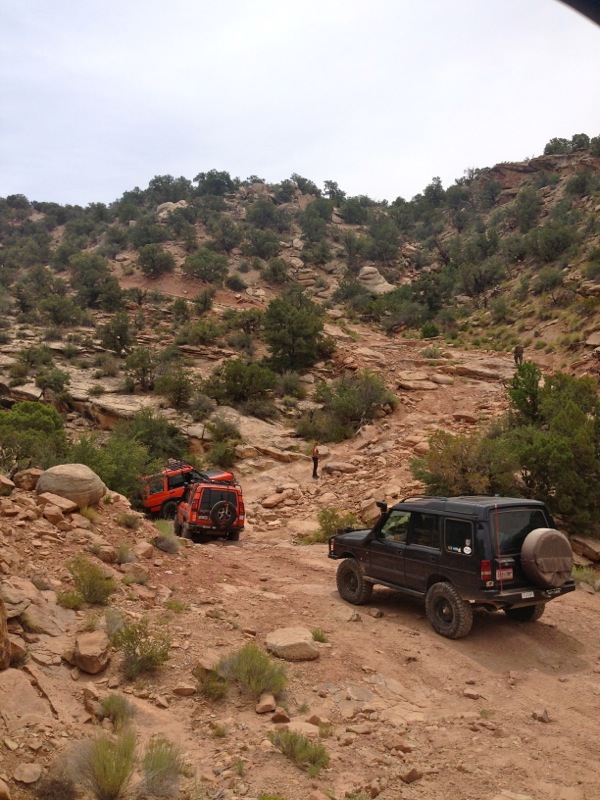
We found some trees to drive between and I failed to navigate between them seeing how I had the widest truck and picked up a few new scratches. I think that will buff out.

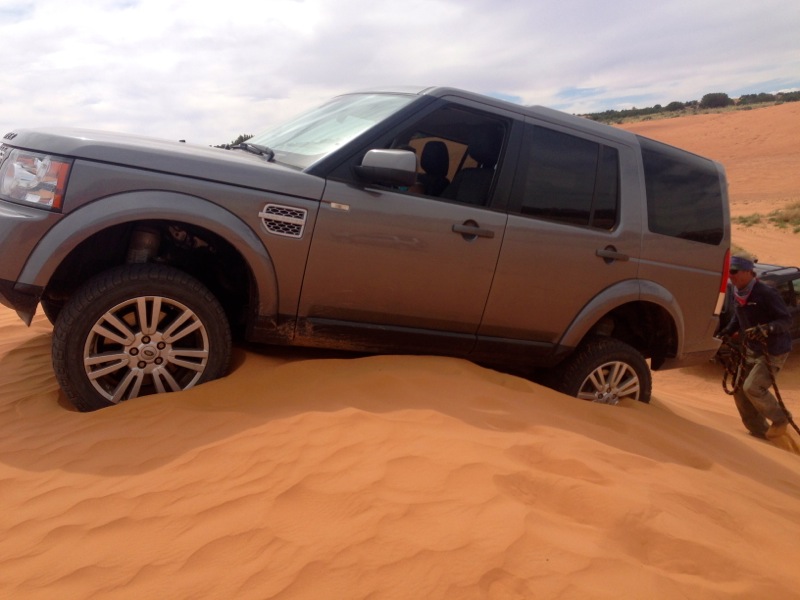
We also got to play in the sand dunes. That was a total blast until I got our truck high centered on the top of the ridge. Oh well an opportunity to practice our recovery techniques. That’s Bill Burke himself getting ready to pull me back down the hill. I made it all the way up on the next attempt.
Ok after all that fun we got back home and I got back to work.
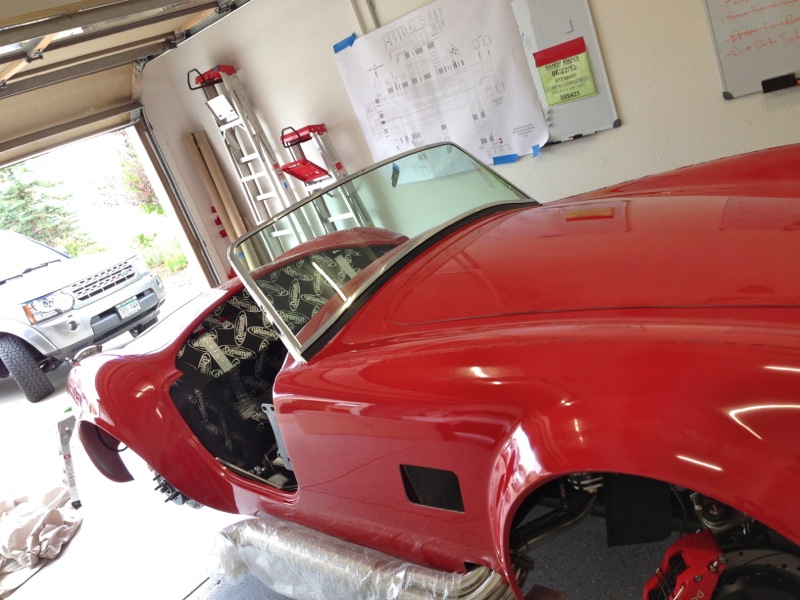
So since the last update we’ve gotten the windshield installed.
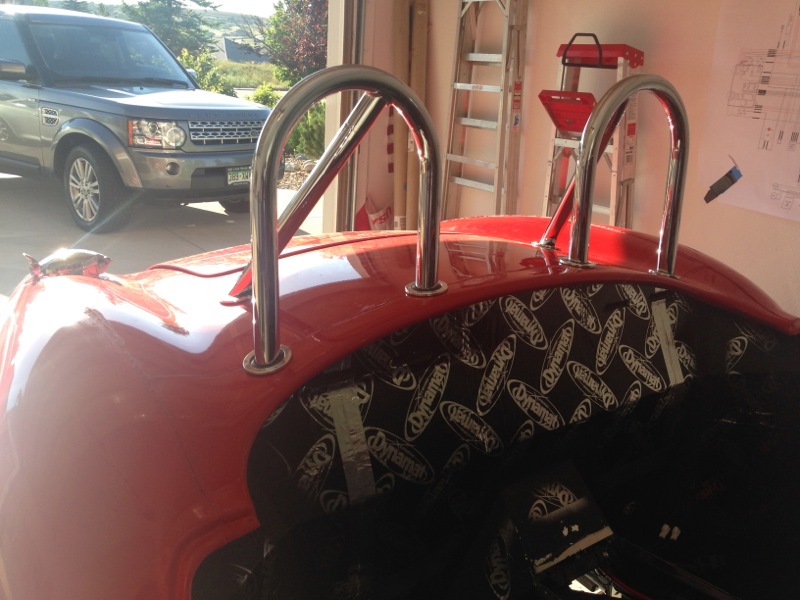
We also got both roll bars installed. This was a bit of task and once again I couldn’t have done it without Destinée’s help.
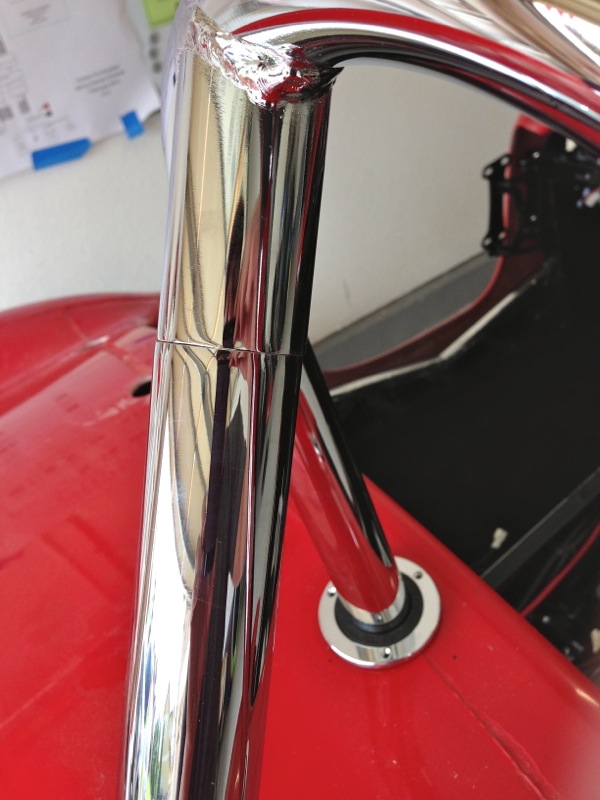
Now I’m showing this pic of the down tube to explain the next few pics. Normally what you would see here is a bolt just below the seam on the down tube. Inside is another smaller tube that is welded to the upper tube and slides into the lower one. While that would work and in the 60’s when these were race cars that was just fine, but I wanted something a little cleaner and fortunately someone has come up with a solution.
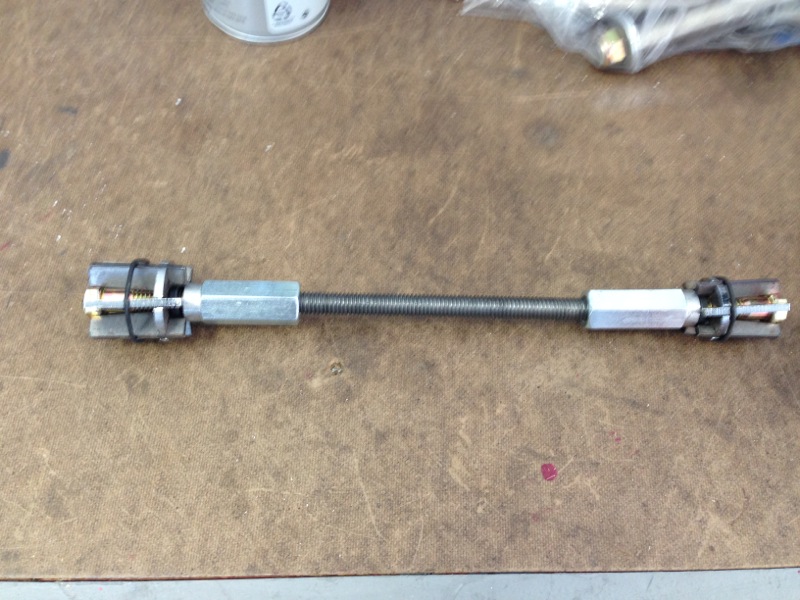
And here it is. Sorry for the slightly blurry pic by the time I realized it was blurry it was too late as they are inside the down tubes and I’m not taking them out for a pic as they were a real PITA to put in. It’s basically a wedge system that screws into place inside the tubes. The first pic shows the whole thing assembled. Each wedge goes into one end of the tube and is tightened locking the wedge into place. Then the threaded all rod ties the 2 together by twisting the down tube until it pulls tight. And then you have a nice clean look. Question is will it hold as secure as a bolt if the car is flipped upside down and sliding down the road at 40mph, who knows, but then I will probably have other problems to worry about.
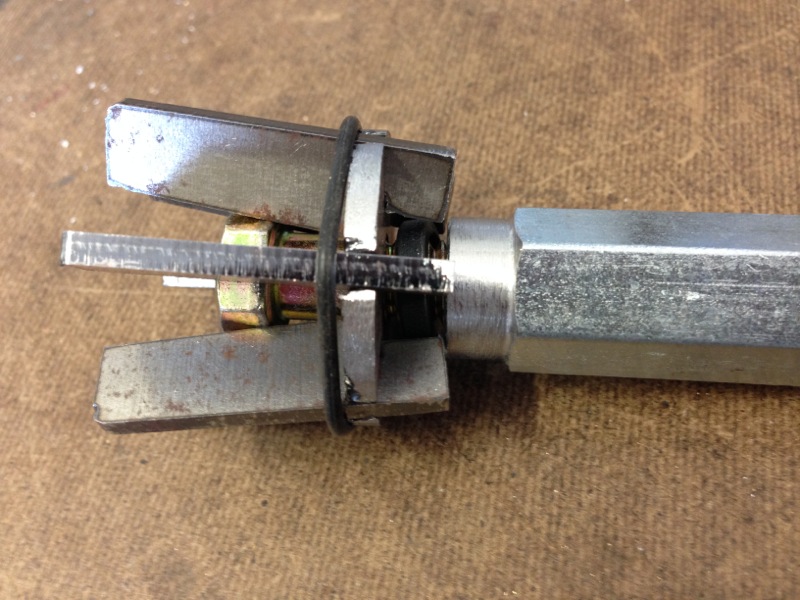
Here’s the wedge prior to expanding.
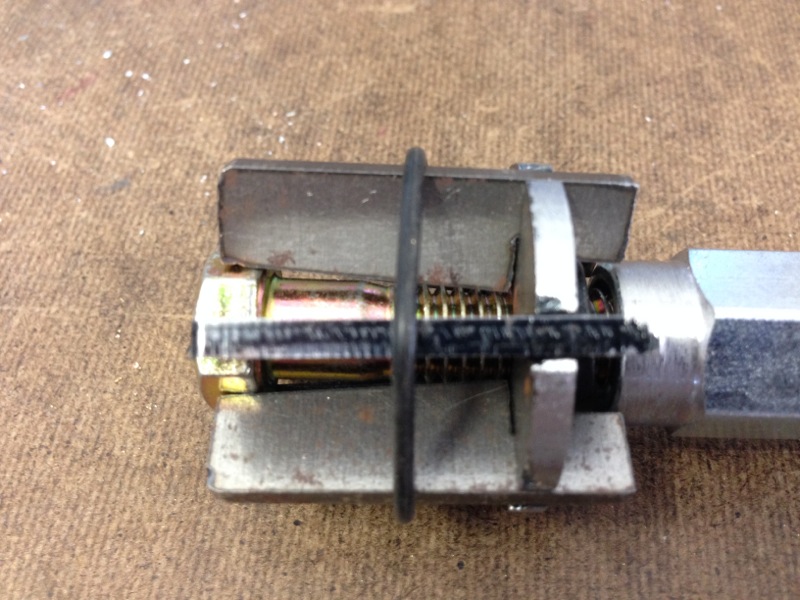
And here is the wedge expanded.
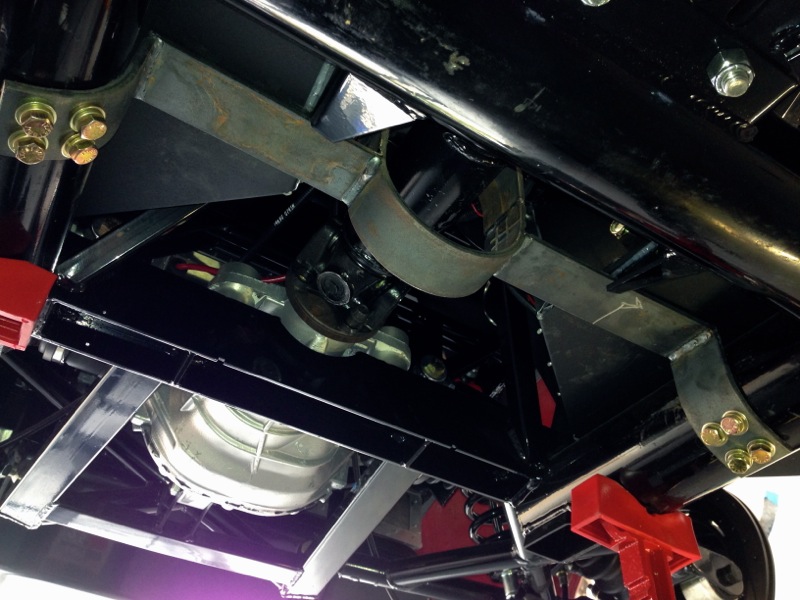
With that done up top I moved to something on the bottom of the car. Below you can see the drive shaft safety loop installed. It’s the un-painted metal piece with the 4 yellowish bolts on each end. Since this is a rather small car with the engine set pretty far back, the rear of the transmission is right about between our hips when we’re seated. If the front u-joint were to fail there’s not much between us and the drive shaft wiping around so this hoop helps contain the drive shaft in that event.
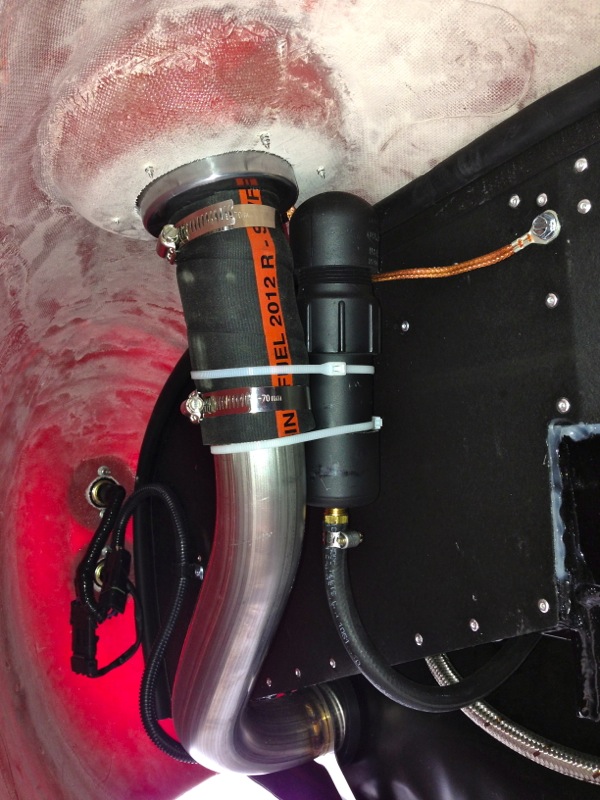
Here you see the black gas tank vent canister on the right zip tied to the filler tube. The tank has a vent that vents the gas fumes from the tank. The problem is it makes the whole garage smell like gas. The solution is essentially the same as what’s on modern cars, a charcoal canister to filter the smell from the fumes. So I made one. The rubber hose comes from the vent and into the bottom of the piece of PVC pipe. It’s filled with activated charcoal, the kind you would use to filter your fish tank, and there are vent holes in the top cap. The cap is removable so I can replace the charcoal if needed. This has done the trick and no more gas smell in the garage.
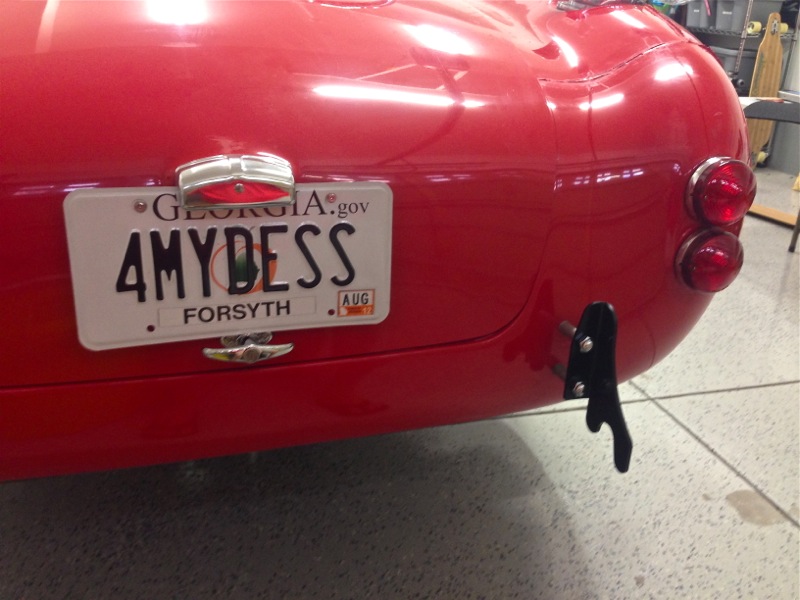
I also got the license plate holder and light installed as well as the trunk latch and handle. Now here is a common problem on these cars. It seems Factory Five on the Mark IV cars went back to the original dimensions between the light and the handle. As I understand it that was fine back in the days when these bodies were originally designed for British plates as they were smaller than our plates. The previous model from Factory Five, the Mark III, had the light/holder higher but is referred to as the perky butt car because it makes for a more pointed trunk lid. A couple of options exist, one is to cut a notch in the plate to go around the handle, but that invites attention from our friends in the police department as it’s illegal to modify a license plate. And who needs any additional attention from them when driving one of these cars. Another option is what I’ve gone with. Essentially the light is reworked and a slot is cut into it that allows the plate to slide up inside of it and there’s a bracket behind the plate raising the screw holes. This gets the plate mounted without any modification. In case you’re curious that is not the plate for this car and was just the one I had available to test fit everything and I already told Destinée not to get any ideas. She has helped out a lot and I’ll let her drive it but she’ll have to get her own and I’ll help her build it. You will also notice I have the rear quick jack’s mounted. These are what the race cars had for bumpers. Eventually they will be chromed when the body goes off for paint but till then they are just painted gloss black.
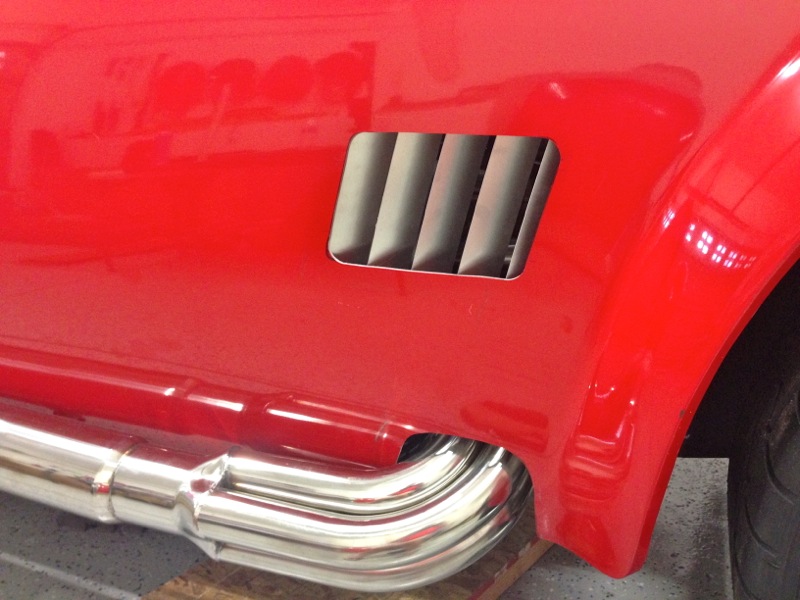
I also mounted the side vents. These are the ones that came with the kit and they are OK but I bought nicer ones that will be mounted once the final body work and paint are done this winter.
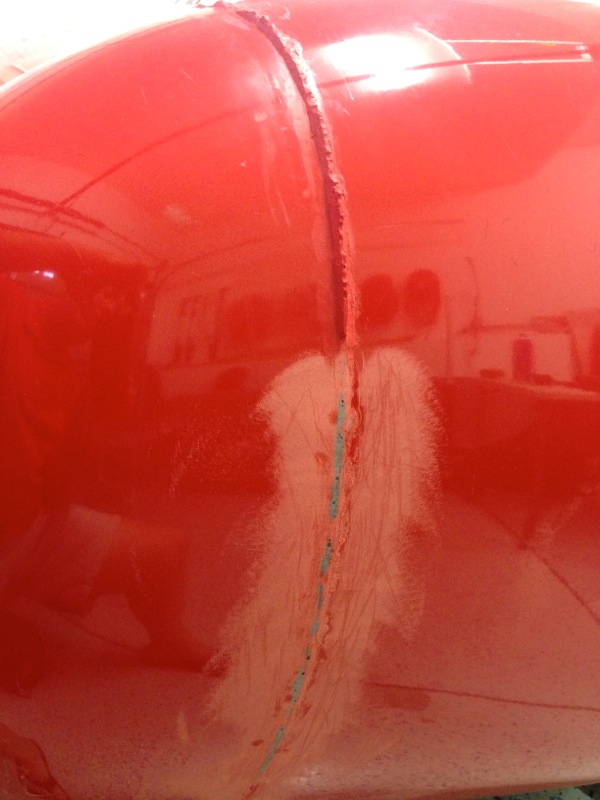
Speaking of body work I just started knocking down the seams on the car. I know some people have been confused by the red and thought that is the color of the car. Well it’s just the fiberglass gel coat and you can see one of the seams here that I started to sand down. The bottom part is sanded and the seam is still there on the top. The plan is to just knock these down and spray some matching red paint on them for now. We plan to drive the car through the summer and when winter comes we will send it off to body work and paint and they can take their time through the winter and we get to drive it through the summer, assuming I can hurry up and get it registered.
Well that’s it for now. See you soon.
Finally caught up with all your posts, Randy. The Cobra looks amazing and I’ve been having clandestine dreams about a project vehicle again…must clean garage… although I might stick with building something that can handle Moab. Perhaps a slickrock crawler with expedition comforts should be your next build. Also, it might be time for some ARB bumpers on the LR 🙂
Yep. Got rock sliders showing up tomorrow. A bumper is in the design stages. I think a cross between a Tactical Rovers bumper and an ARB bumper will be the look I’m wanting.