
Drill, Drill, Drill……………..And then Drill some more.
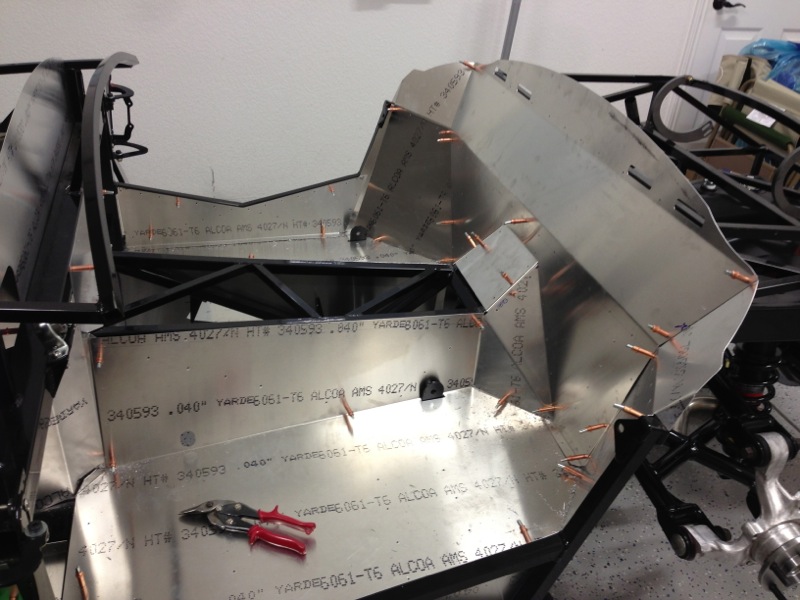
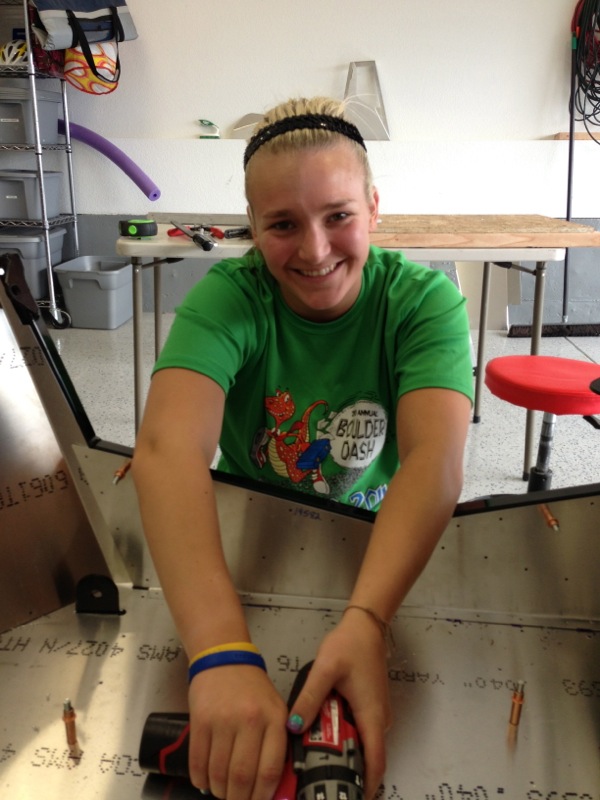
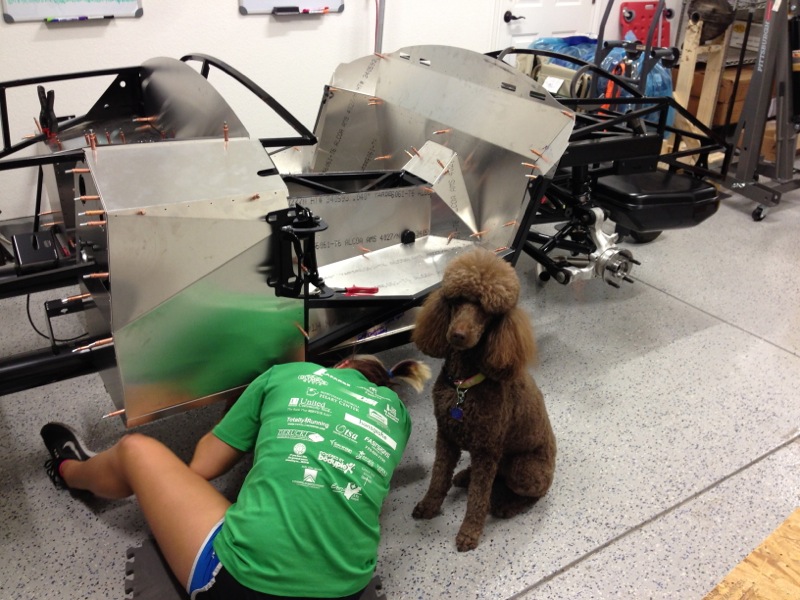
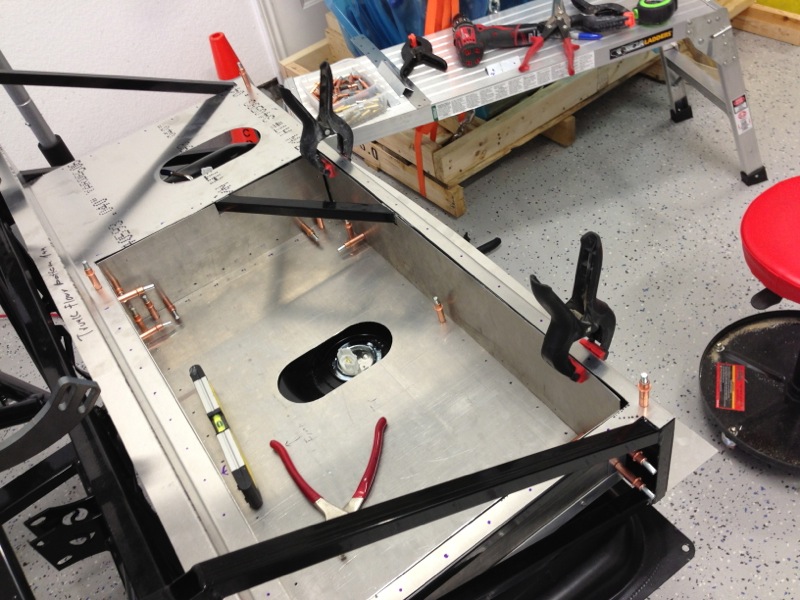
This last weekend and over the Labor Day Weekend it was all about getting the majority of the panels fitted. This included the driver side footboxes, passenger side footboxes and about all of the panels in the cockpit. It involved lots of fitting to ensure alignment, marking holes for rivets and then drilling and more drilling and more drilling and I think you get the point. Fortunately, Destinée was there to lend a hand and we got it mostly done. As for the number of holes we drilled we lost count somewhere after 500 holes. Some of the holes secure the panel to another panel while some connect to the frame. None of them are actually riveted at this point but just held in place with the Cleco’s to help with alignment. The panels visible in the engine compartment will eventually be powder coated while others exposed to the wheel wells and under the car will have some sort of undercoating applied. Those in the cockpit and trunk will be covered with carpet. Below you can see the firewall Cleco’d into it’s position.

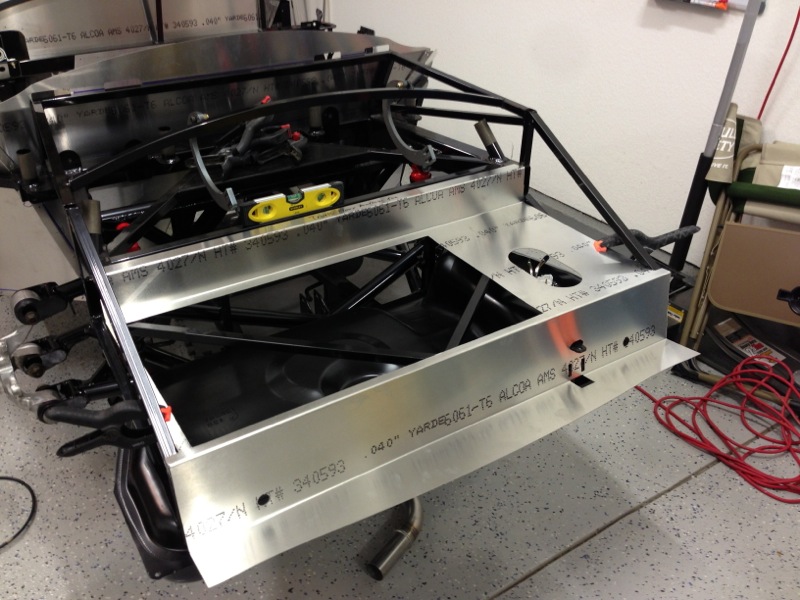
Here is the cockpit from the drivers side. You can see all the panels in place except for the transmission tunnel cover.
Thankfully Destinée helped out. Otherwise I think I would still be out there drilling holes.
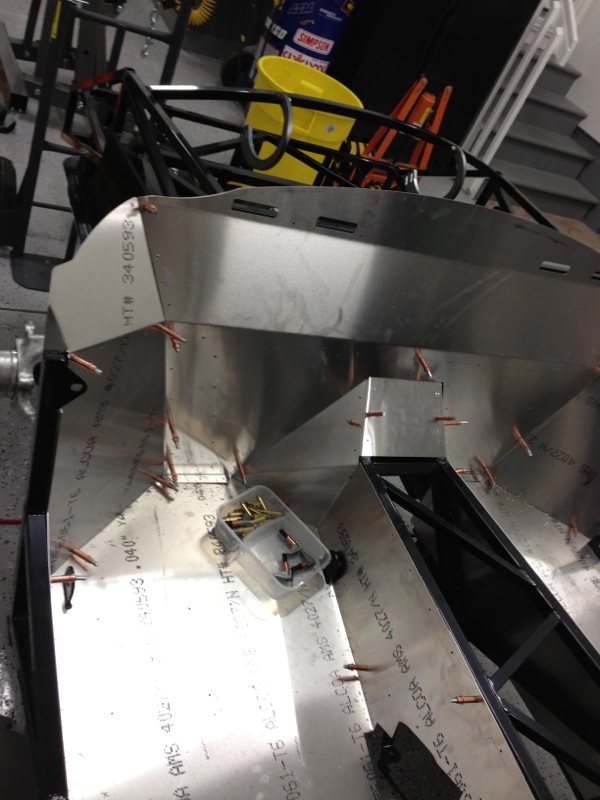
Passenger side view of the cockpit.
And of course we can’t work on the car without Precious keeping us out of trouble. That’s her “stop playing with your phone and get back to work” face. Here Destinée is working on the panel for the bottom of the drivers footbox and drilling more holes.
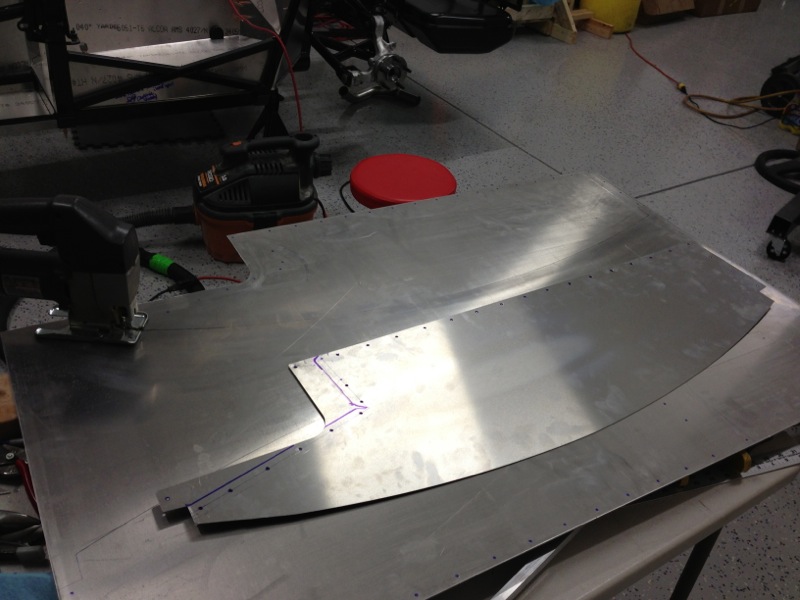
Earlier I showed the firewall all done and in place. Well that was till I changed my mind, the beauty of building this car, I get to do that. This last Saturday we went out to Alreco, a local Aluminum Recycler, to pick up some aluminum sheet to expand the trunk, I’ll get to that in a sec. If you live in the Denver area and ever need any type of Aluminum stock, he has it. It’s a bit of a drive up to Henderson, CO., but well worth it if your needing aluminum. And he sells it by the pound so good prices as well.
One of the things I was looking at was changing the Firewall to a thicker sheet. The stock one is .040 and is sort of flimsy especially if I’m going to be mounting master cylinder reservoirs, the fuel regulator and maybe the heater blower on it. So, I picked up a sheet of .090 aluminum, much thicker and much sturdier and I cut out a new firewall. The pic below shows the original one used as the template and the beginning of the new one. I’m just starting the curved cut and you can see the jig saw on the left side.
Ok, now for expanding the trunk. One of the popular modifications is to open up the trunk a little bit by cutting open the area above the gas tank and dropping the floor. There’s just a bit over 5 inches of extra depth to be had and about 14 x 26 inches in area. You’ll notice in the pic below the floor is already cut out and you can see the top of the tank and some of the cross bracing. I decided to take out the brace on the driver side but left the less intrusive one on the right side. Some people take them both out, some people leave them both in and some weld in whole new frames for the drop. I don’t have a welder, yet, and I don’t know how to weld, yet.
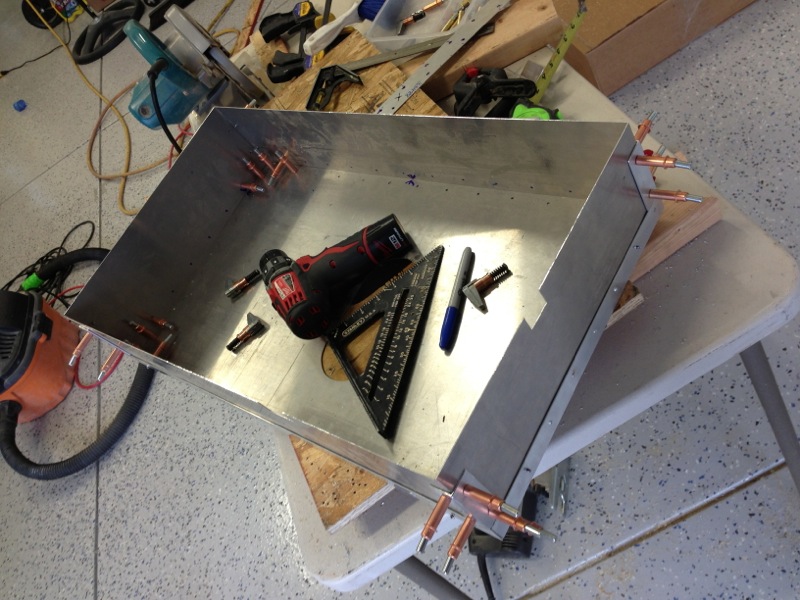
Now that I had a hole in the trunk I had to build a box to fill it. The pic below shows the box roughed together. The elongated hole in the bottom is for access to the fuel level sending unit in the gas tank.
And here it is test fitted into the space. It doesn’t seem like much but when you realize how small the trunks of these cars are every extra cubic inch counts. Plus our plans are to go on some of the longer road trips with the car, so this extra space will come in handy as well. In the pic below you can see the top of the fuel level sending unit in the cut out hole. At the top of the pic you can see the other cutout for access to the fuel pump. You can also see that the brace on the driver’s side is gone but the other one is still in place.
Well that’s it for this post. I’ve been working on getting all the different pieces I need to start running the fuel lines and brake lines as I’ve mentioned in a previous post. Turns out it took a bit of time to figure out all the right fittings for both the brakes and fuel lines. Most of the stuff showed up on Friday but I’m still waiting on some tubing and a couple of tools and they should be showing up this week. And then I’m still not sure if I got everything I need or the right stuff. You’ll have to wait for the next post to find out.
Wow! It’s starting to take form! Good thing you had your helper!
Willie
Randy,
You are becoming quite the sheet metal worker. The underbody work is looking fantastic! Love the expanded trunk work.
Best, MK
Nice job on the trunk. Looks great. Very impressive metal wielding skills. It must have been nice having help drilling all those holes. I didn’t. Do yourself and your hands a favor and buy an air riveter. I bought a $160 craftsman online…best decision I ever made. Lookin good man.