
And…..She’s back!
First off let me say I hope everyone had a Happy Thanksgiving. Here at the Kinsey house we had a great Thanksgiving and I also took the whole week off. This allowed me to catch up on some of the Honey Do’s that needed to be taken care of around the house as well as get some time to put the transmission back into the Cobra.
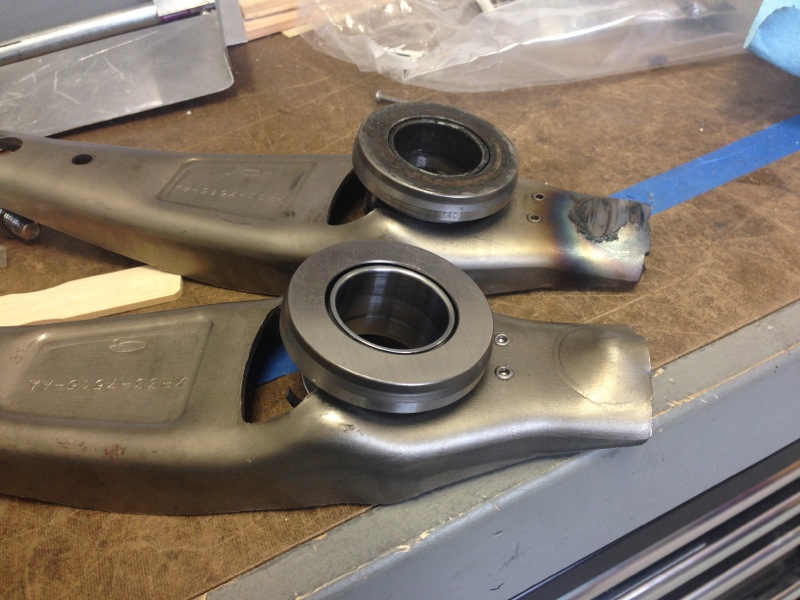
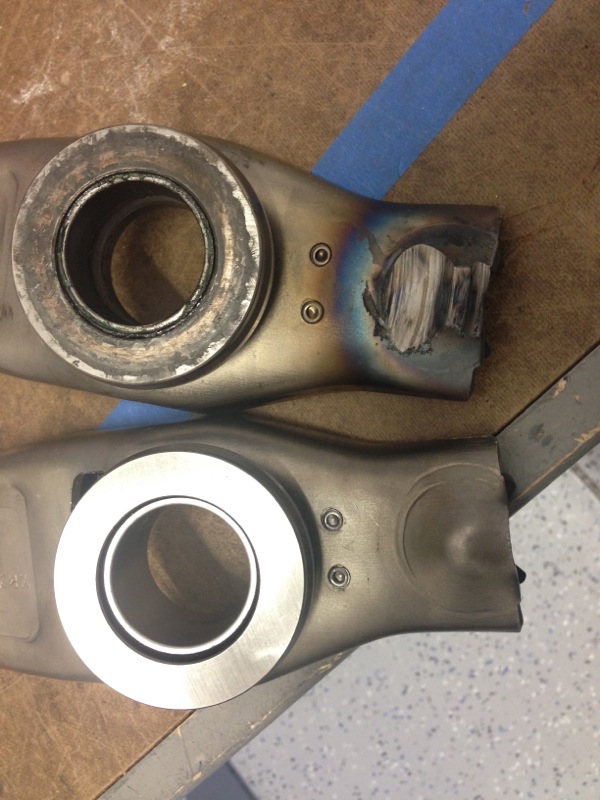
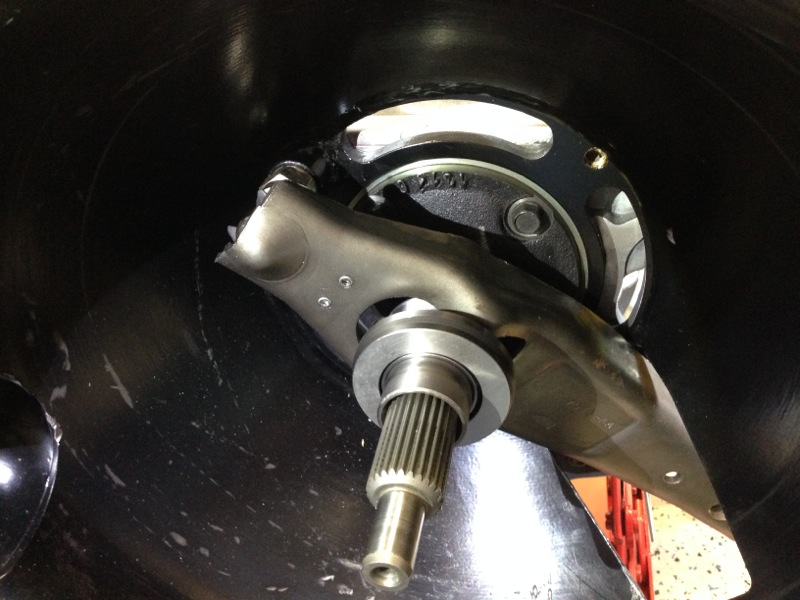
So the new parts arrived and the first few pics will help show how much damage was done by my improper adjustment. The damaged throwout fork is in the top of each pic, sorta obvious. You can see what the tip is supposed to look like and how much metal was ground away from rubbing against the pressure plate. Both forks also have the throwout bearing attached to them.

With the new parts on hand the challenge was to figure out how to properly set the height of the pivot bolt so that there isn’t any rubbing. To high and, well we already know the result of that, to low and there might not be enough pivot of the fork to completely disengage the clutch. First thing first though I had to figure out how I was going to even measure it without installing everything in the car and then going back and forth/trial and error approach. While that would work it would take quite a bit of time and be rather difficult as getting the tranny in and out isn’t very easy.
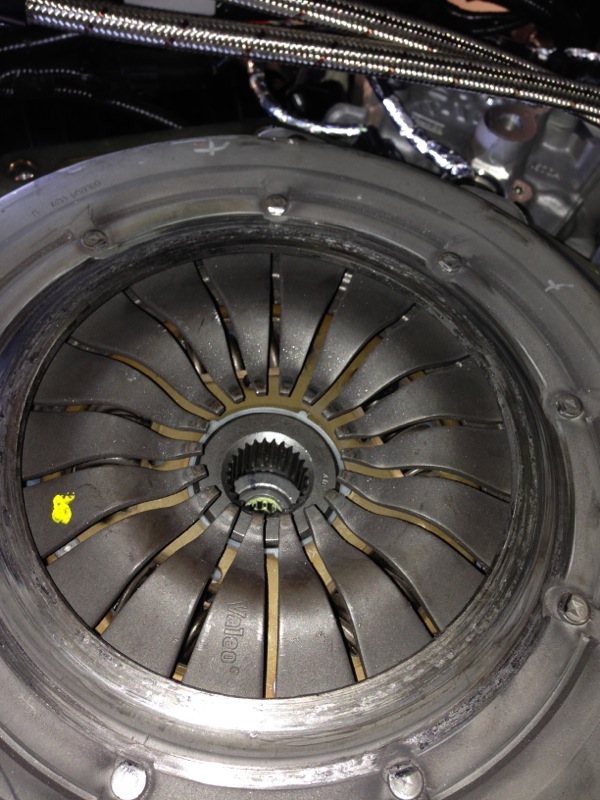
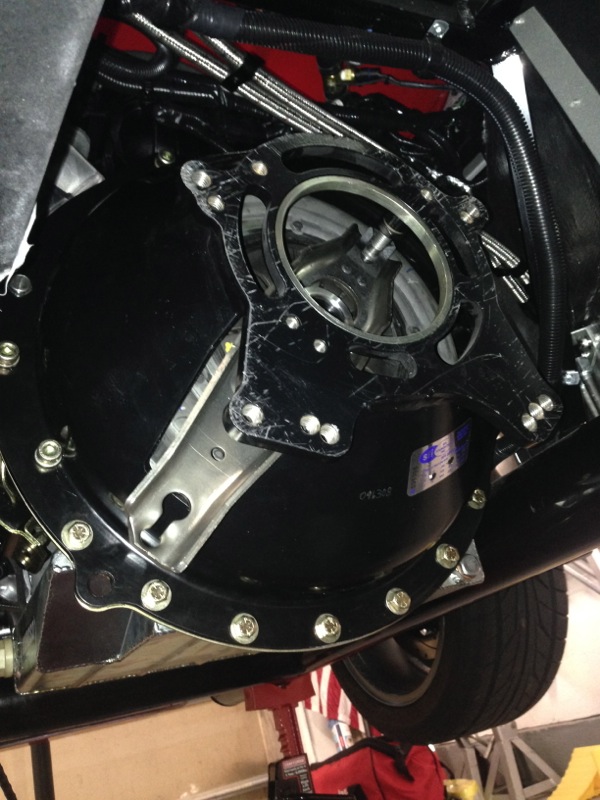
That said what I did do was first reinstall the clutch and pressure plate onto the engine. Then I bolted down the backing plate and measured the height of the pressure plate from the backing plate. The backing plate mounts to the front of the bell housing so I could then measure from that point to the fork and figure out how much clearance I had. The pic below shows the pressure plate mounted back on the engine.
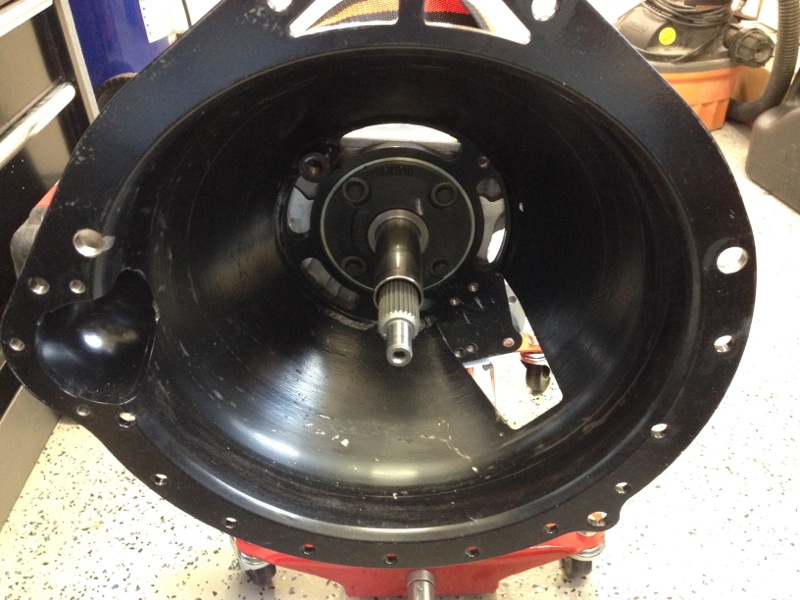
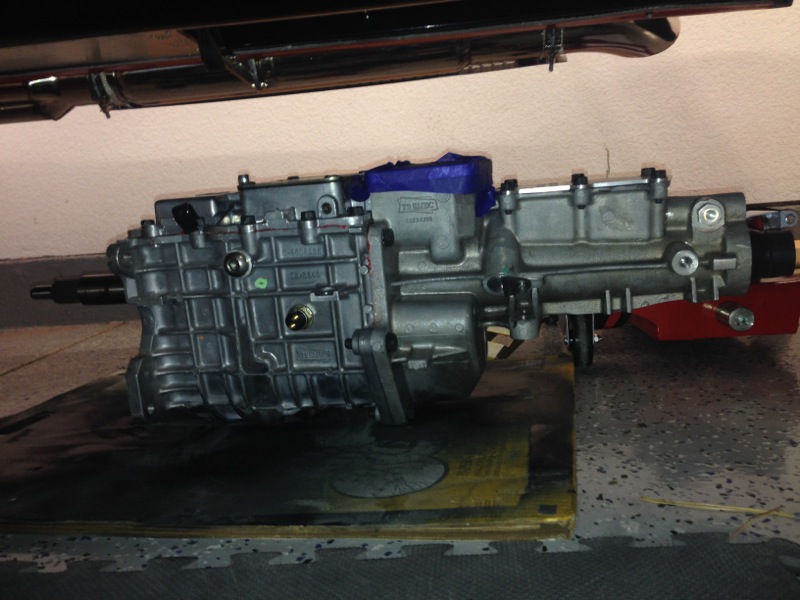
And here you see the bell housing mounted to the front of the tranny.
Here is a pic of the pivot bolt test fitted to start to get an idea of how high I needed to set it.

Once I had it set to a starting height I then installed the fork and throwout bearing.
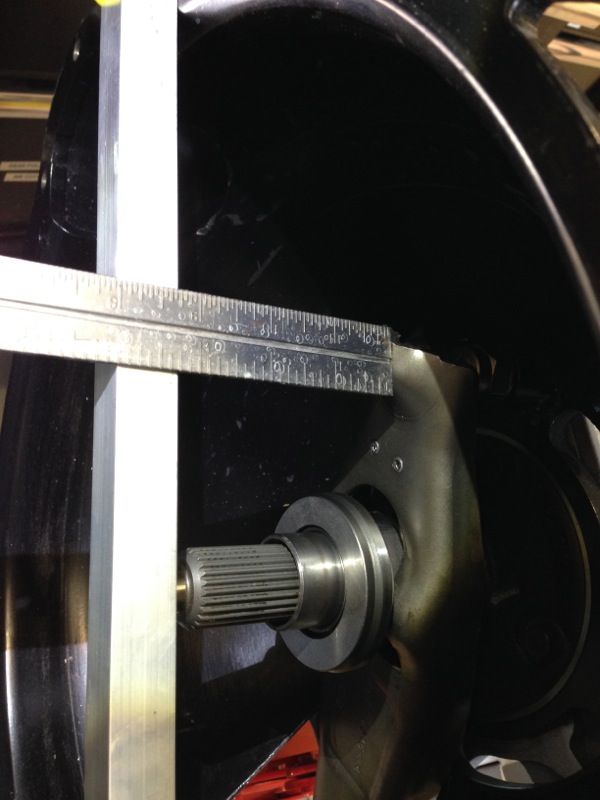
Then I clamped a straight edge on the face of the bell housing and measured to the highest point on the fork which happens to be the area that rubbed against the pressure plate. The height of the pressure plate turned out to be 3¼ inches. So I knew the fork couldn’t be any higher than that. I decided to set the clearance at 1/8 inch so I set the fork 3 3/16 inch from the face of the bell housing.
Once I had the pivot bolt set to that height I made sure this time it wasn’t going to come out. That’s red locktite, a lock washer and a locking nut. About the only other thing I could have done was to tac weld it in place but I think this will hold. (Side Note – Actually the locktite and the lock nut will do the work, turns out the split locking washer doesn’t do anything. Don’t believe me, check out NASA Reference Publication 1228 page 9, second paragraph under Lock Washers it states “In summary, a lockwasher of this type is useless for locking” gotta figure NASA knows what they’re talking about.”) I left it in there as a spacer.

I then removed the bell housing from the tranny and mounted it to the back of the engine to make sure I didn’t have any interference. I also got my hand in there with a 1/8 thick shim to make sure it fit between the top of the fork and the pressure plate. All good at this point.
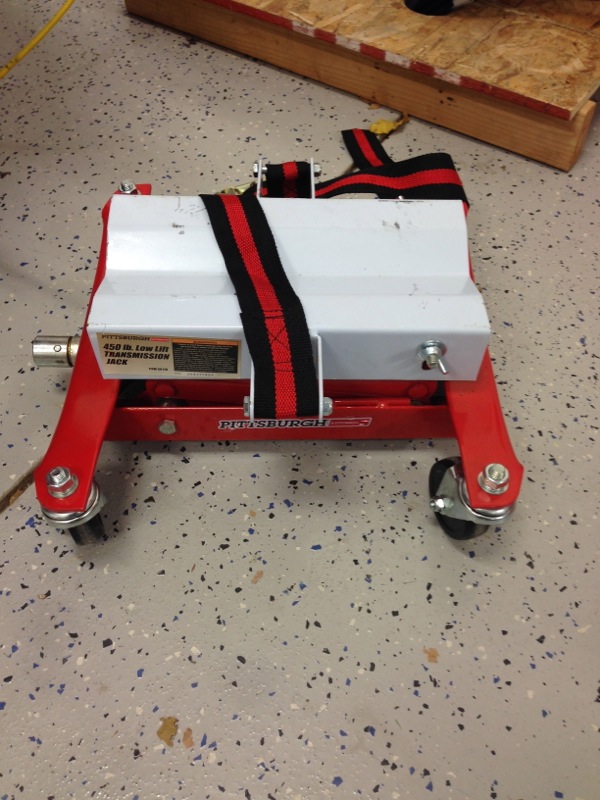
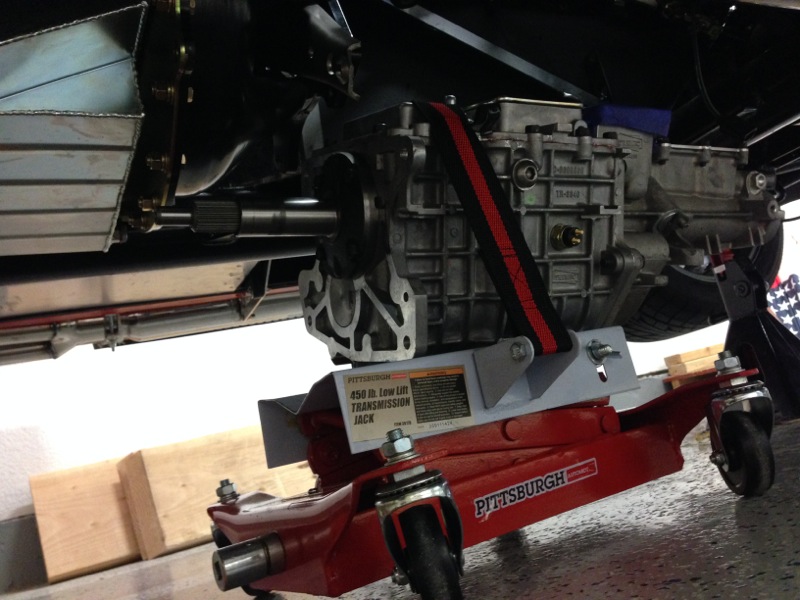
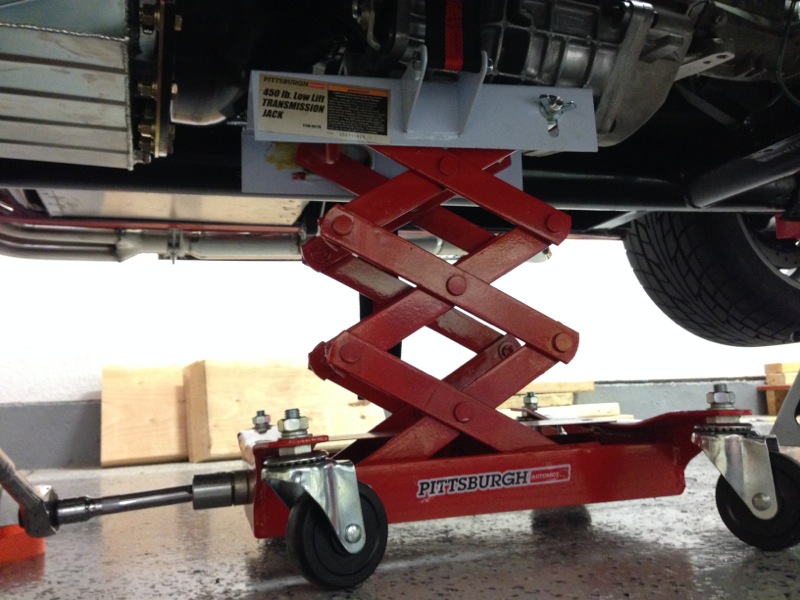
With everything looking good it was time to put the tranny back in. When I originally pulled the tranny I had it balanced on my floor jack and strapped to it as best I could. It wasn’t the optimum way to do it but I did have gravity on my side. Putting it back in was going to be a different story so I picked up a tranny jack, pic below, to help with that.
I didn’t have the car sitting high enough on the jackstands and didn’t feel like raising it so I slid the tranny under the car and then onto the jack.
Here it is up on the jack and ready to be raised up into position.
And here it is almost in. The tail shaft is past the frame cross member and the input shaft is lined up with the throwout bearing, clutch disk and the input shaft bearing. At this point it gets to about 1″ of being all the way in and then 4 things have to line up very closely for everything to come together. It took me about an hour of wiggling, pushing, twisting, cursing, adjusting and one last twist and it finally popped into place.
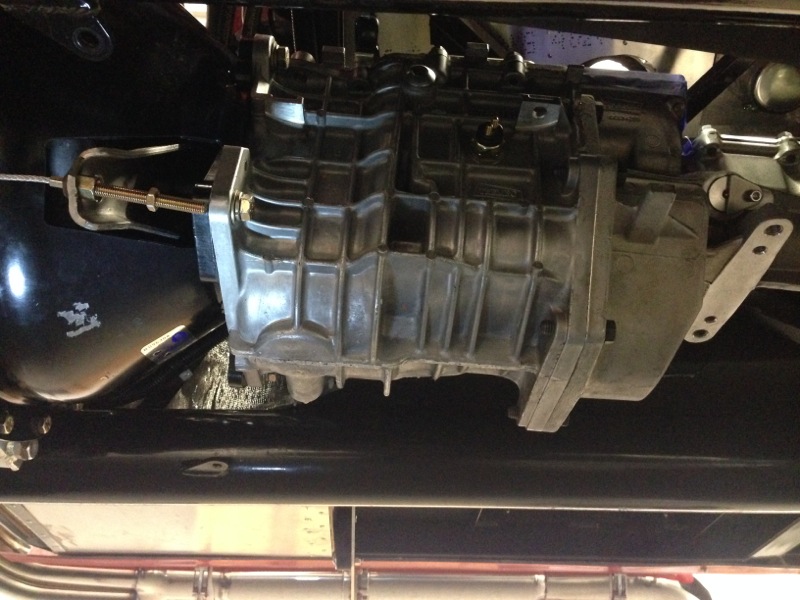
And here it is back in place. With it bolted back to the bell housing I started putting back all the other pieces, like the rear tranny support, the shifter, the clutch cable, tranny fluid, drive shaft and safety loop.
And with the whole car back together the final test was to start it up and see if everything was working. I’m very happy to say it started up and ran much nicer than it did previously without the noise, the noise and vibration that should have been an indication to me sooner that something was more wrong than just an adjustment. With that done and with the luck that the weather was beautiful last Friday, high 60’s, I took her our for a test drive and everything ran perfect. No strange noise, no vibrations and it even felt like it shifted much easier than previous. With that done I can say I had a very a happy week.
This will probably be the last post for awhile as the next step in the plan is to ship her off to California to have the bodywork and paint done. That’s probably gonna take a couple of months but that’s ok because with Winter upon us there’s no better time to have this done.
Until the next update, probably from the paint shop or assuming I don’t break something else, I’ll see ya around.
Wow! A lot of work! Hope you guys had a great Thanksgiving!
Happy Thanksgiving! Great stuff as always, Randy. Have you mocked up any funky paint schemes?
On a different note, are your holiday lights operational? I’m looking forward to a video and description of your extravaganza. No way I’ll show it to my wife, however. She’ll want something similar, and that’s way too big a project for me.